Forum Replies Created
- AuthorPosts
-
Thank you for correcting me Guy.
I suspected a reason why you didn’t talk about that menu but tried anyway.
I must say that the day my BC6 will fail, it will be a big loss.
As far as I know the answer is No.
That’s an old quest to turn a BL3500 into a standalone speaker or a sort of Beosound 35.
I wanted this for myself very hard, finding the form factor quite interesting.
But there is no easy solution: you need either a specific Beolink converter or a remote key sequence that you nee to enter each time you turn on the speaker. The only “easy” way I can see is using a Beo 5/6 with a macro.But I asked Steve from Sound Heavenly the same question you are now and he also told it wont work at all if you have another B&O device that accept IR commands in the same room which was my case.
I asked the forum once if it was no other solution involving dismantling and soldering: I get no answer.
I wish you luck in your search and this item to be hacked one day.
Before
After…
Hi Guys, It’s done, at least for one speaker.
The other one will wait a bit since this is not a really pleasant experience.
That will also allow me to compare Both speaker with new and old foam.Starting point: the Beolab with stand and fret off and obviously the new set of damping material.
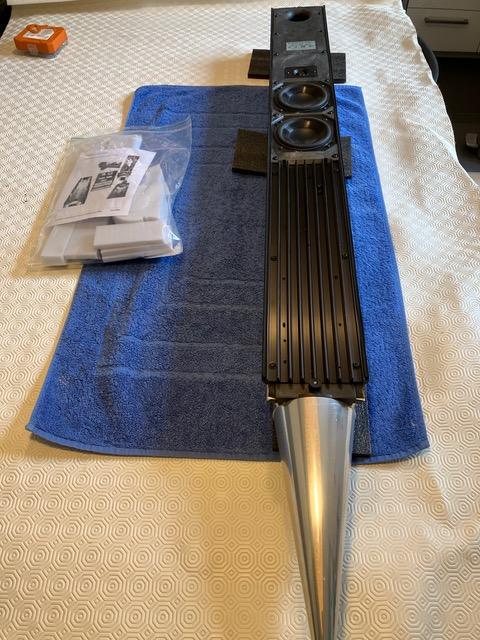
Then take out the screws off: 6 for the amplifier plate, 12 for the speaker plate. All the same.
You need to cut the rubber border use to damp the fret between the two front plates. Use a sharp knife.
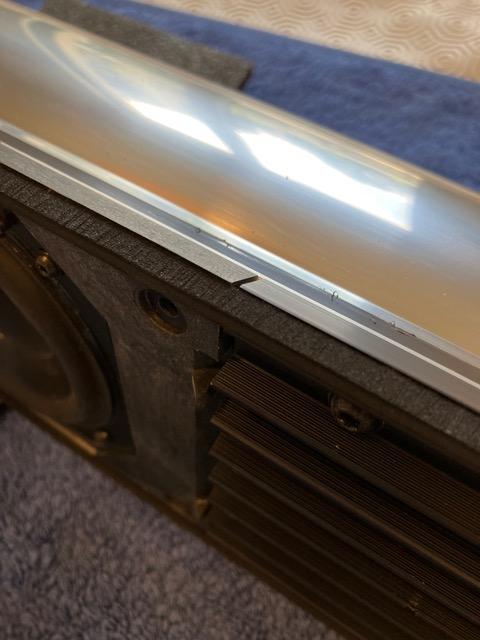
The plates are still firmly glued to the pipe. Insert a flat screwdriver and gently pry off the plate. Then progress to the bottom. I used two very useful little tools Thant came with a garden tinsel from a Scandinavian well known brand to open up the two plates, one side after the other.
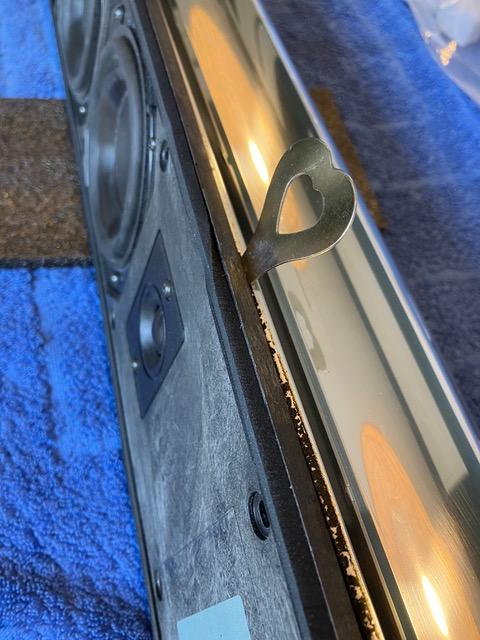
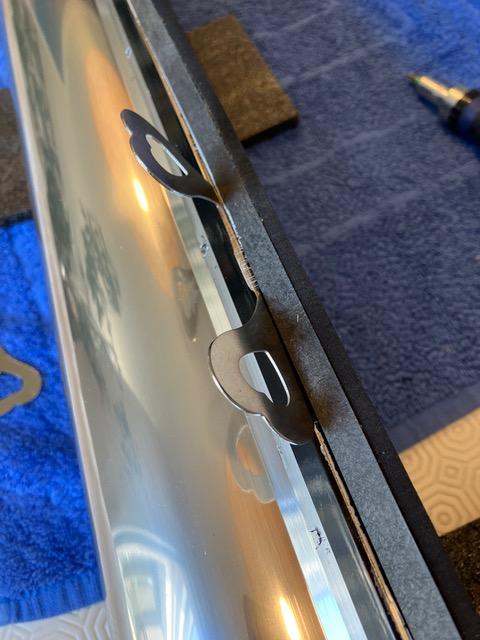
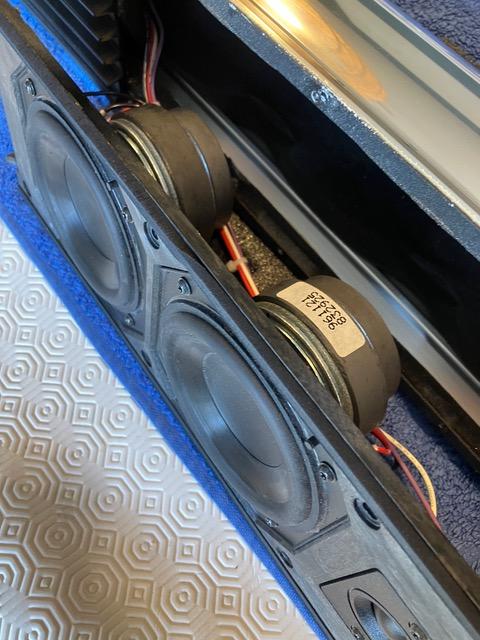
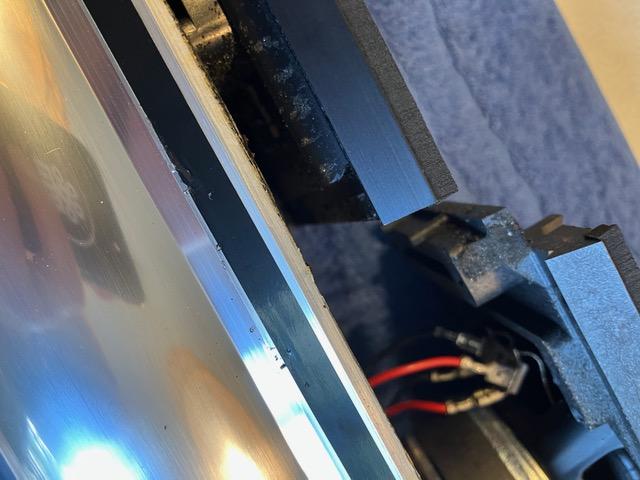
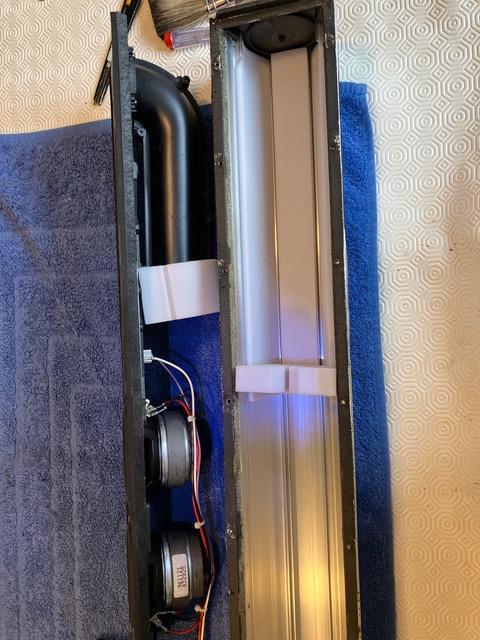
Disconnect all that should be:
- One big socket between speaker plate and amplifier plate. (white/blue/red).
- One big socket (main power/Yellow) between the amplifier board and the cone.
- Two little connectors between the amplifier board and the cone (3 and 4 wires).
Beware, there is also a third tiny connector much larger (7 or 8 wires), you can disconnect it but it loops from the cone into the cone. Don’t mistake it for the one that must be disconnected and pull the plate while it is still attached.
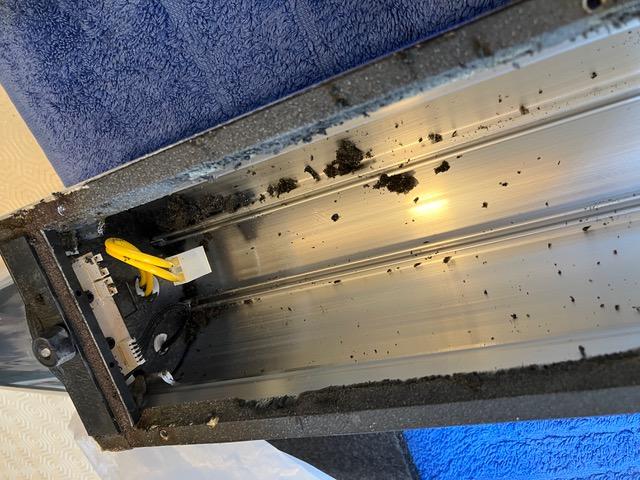
Once everything disconnected, take out the plates: amplifier first, then speaker
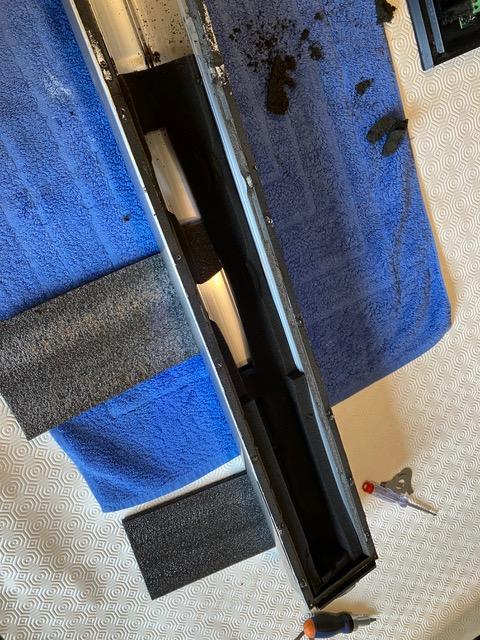
Here start the mess! Use gloves.
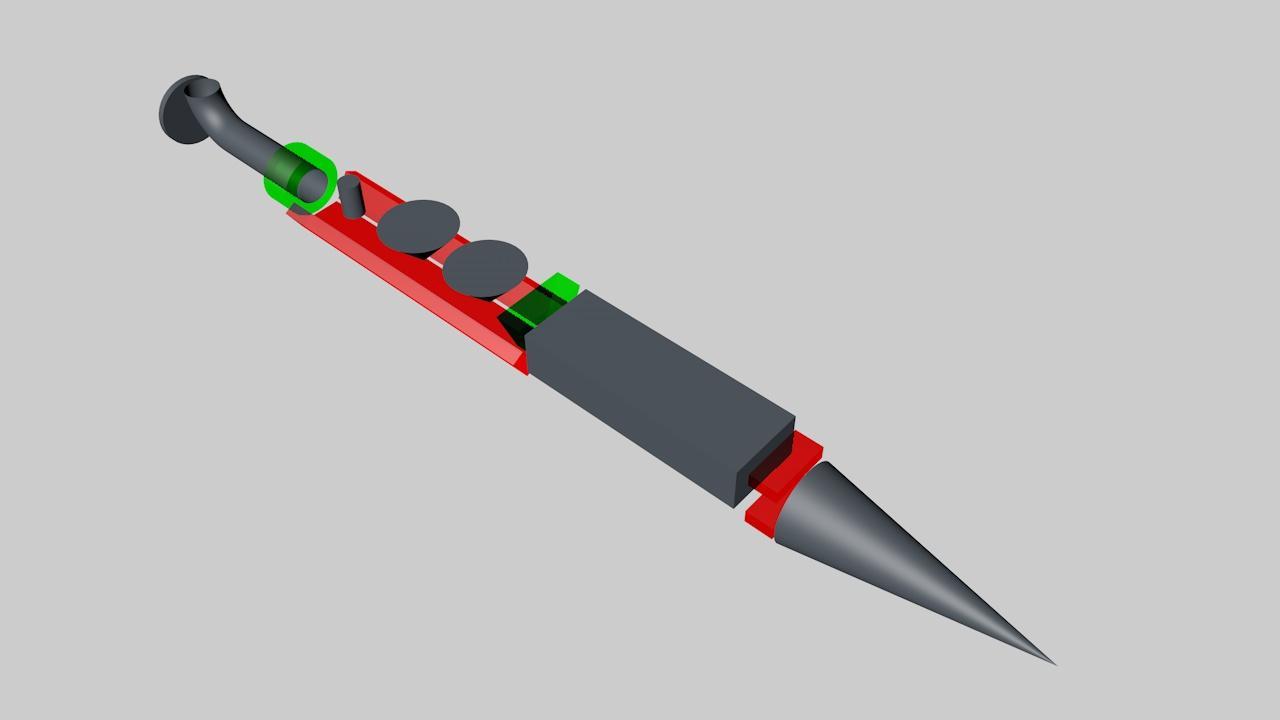
Foam to be removed is located:
- Just above the cone.
- One the amp board, between the actual amplifier chip and the main board.
- In the gap between the speaker zone and the amplifier zone.
- One big piece in the speaker tube.
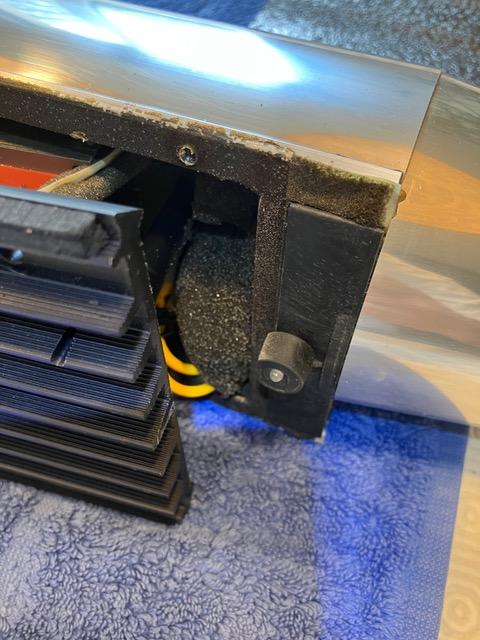
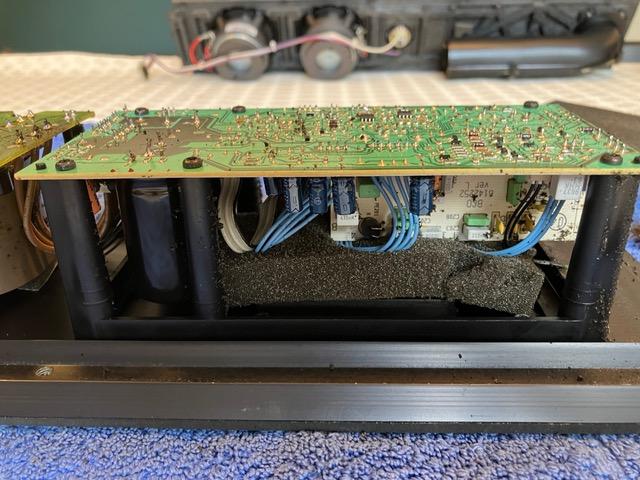
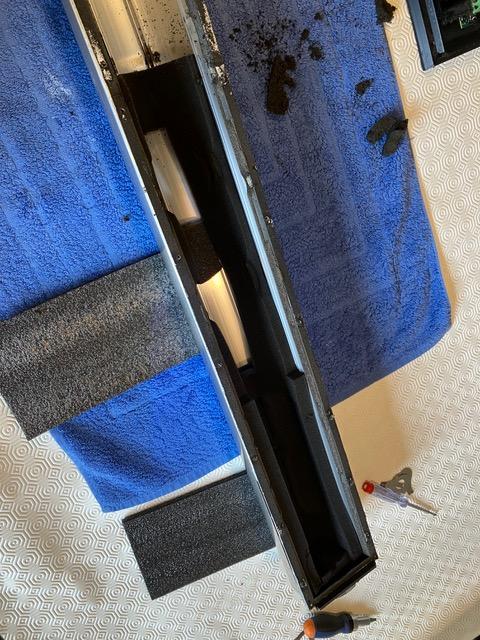
The big speaker piece was in my case quite well, sticky and chewy but I was able to remove it easily in one part.
All the other parts were in an advanced state of disintegration, turned into a sticky dust spread all inside the column. You’re happy when you manage to take out a big piece!.
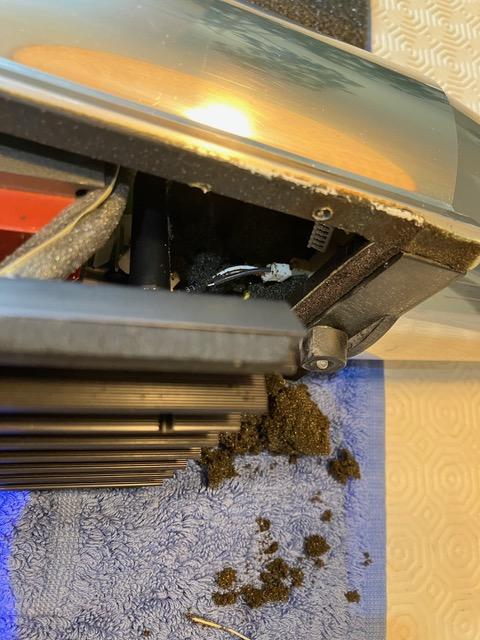
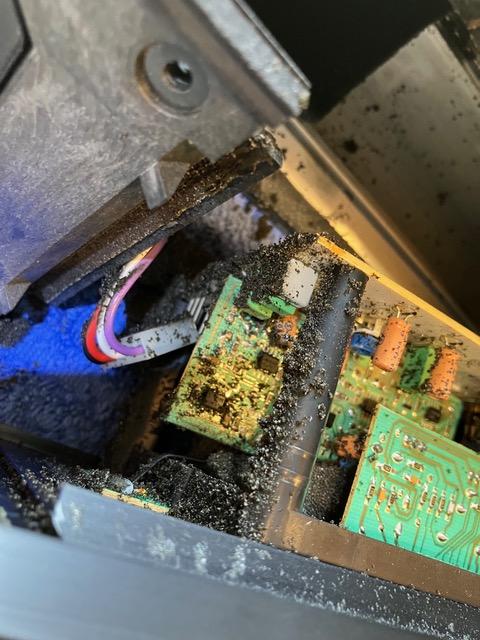
Even the foam sealing between the pipe and the plates is rotted. you need to rub it to clean it.
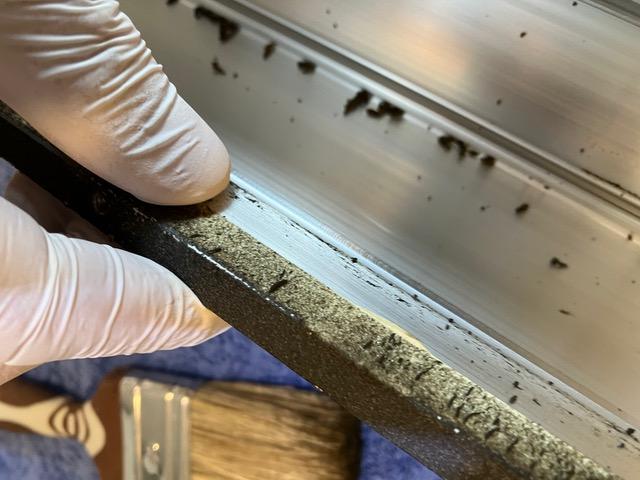
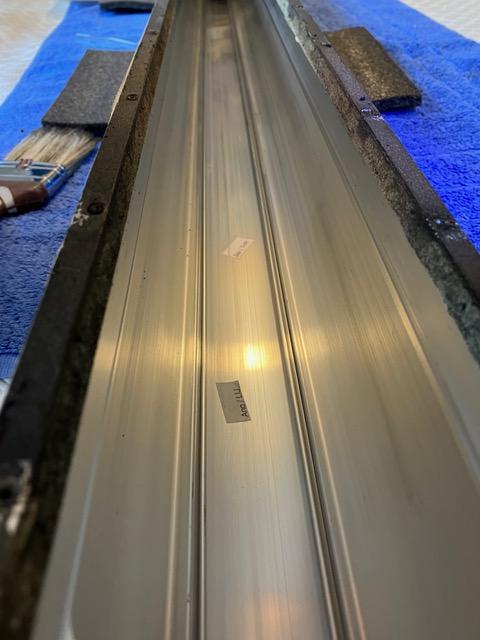
The pipe was vacuum cleaned with the help of alcohol (90°, no isopropyl here in France).
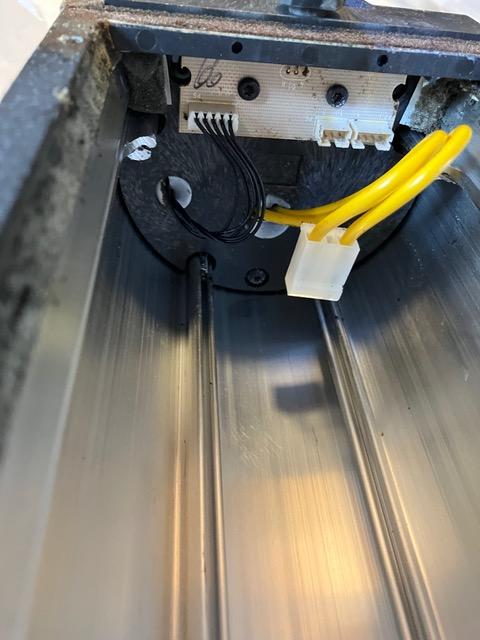
The amplifier board was opened after disconnecting the plugs and cleaned with a brush and alcohol.
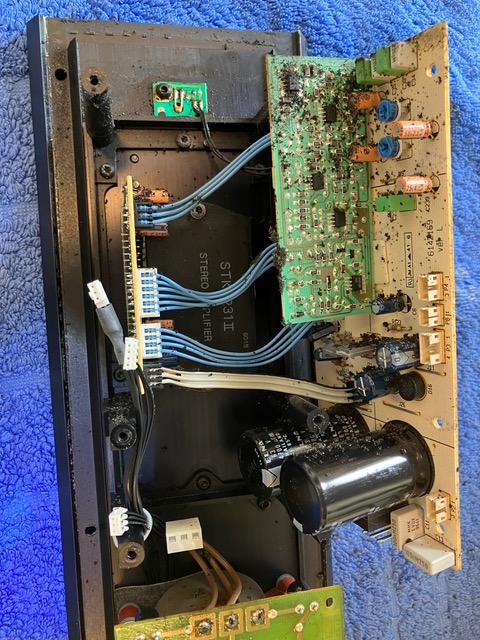
To me this is the most scary part: I don’t like rub a brush on those PCB with so tiny component. I’m not confident enough to know if this is ok or not and I’l afraid of breaking something or hurting a component. SO I did this carefully with a brush and a vacuum cleaner, take out the most of it but after this, it still remain some sort of sticky touch all over the parts. I think it still better the before.
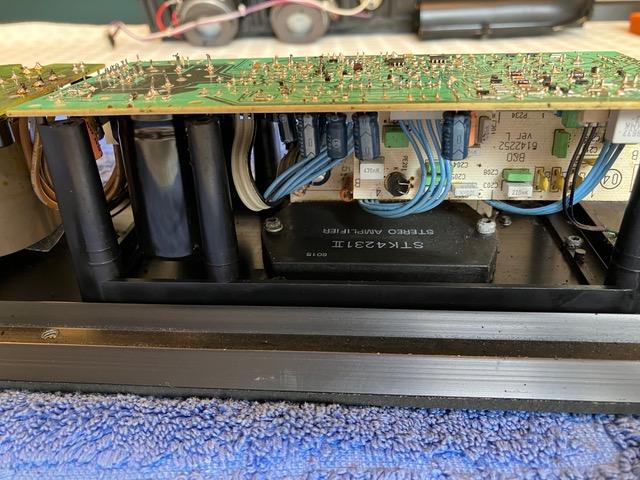
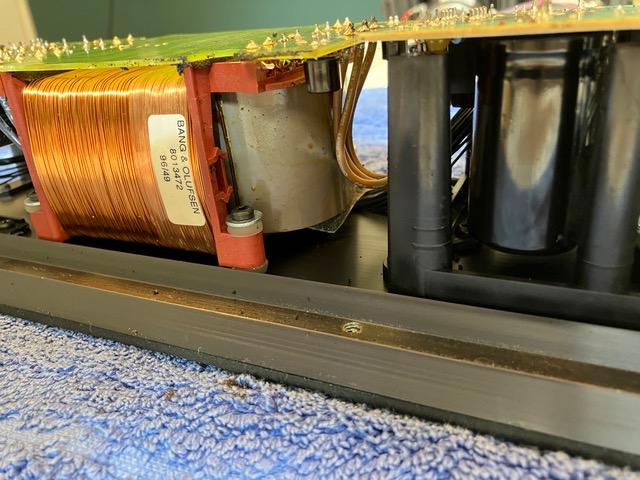
Before screwing the amplifier board to the Amplifier plate, you need to replace the foam between the chip and the board.
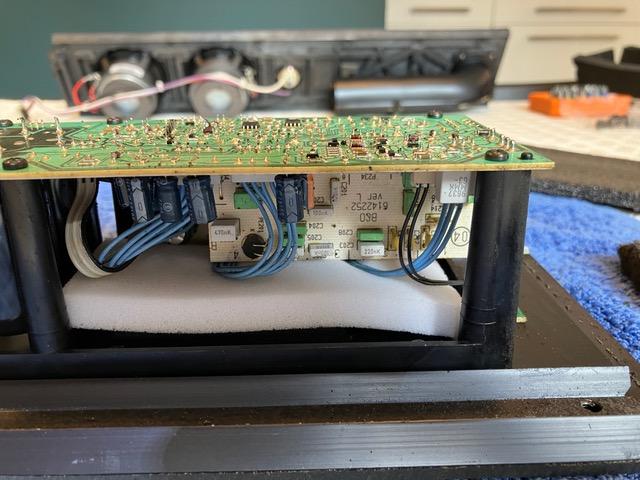
Then clean all the connectors, the speaker socket was particularly dirty.
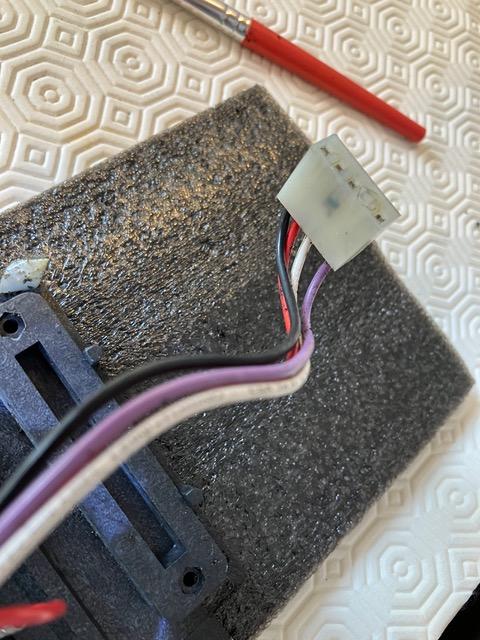
Then you can start the actual foam replacement. Note that the new set has nothing in common with the previous.
Around the bas port entry.
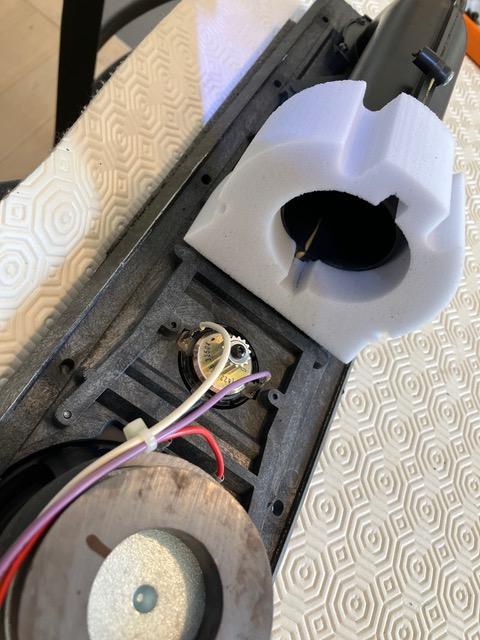
In the column, roughly in the middle behind were the woofers are.
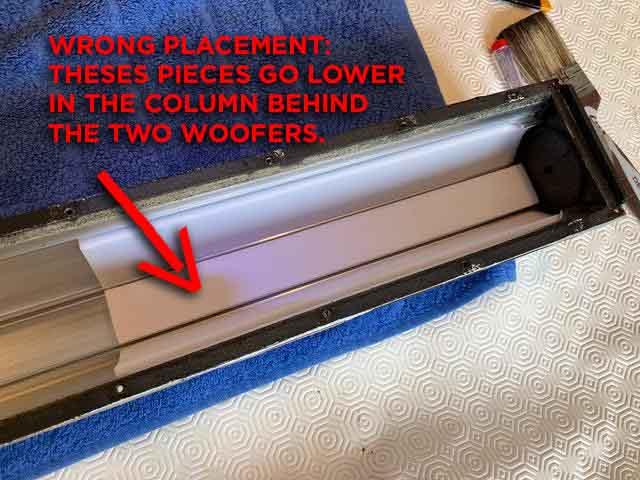
At the base (rear).
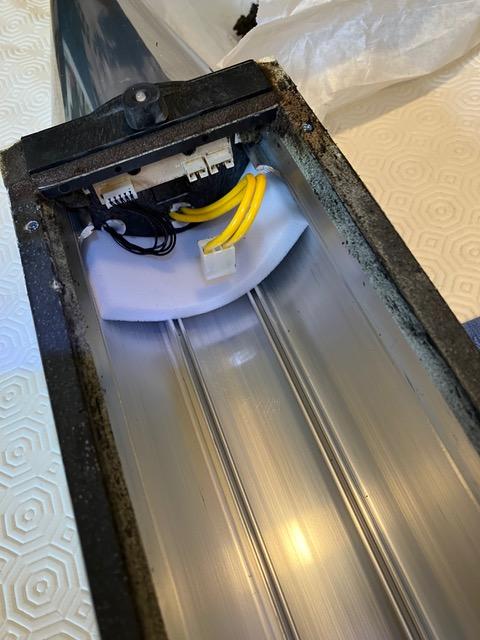
The V shaped one at the bottom of the long strips just above the amp section.
Close the speaker panel and watch out for the speakers wires to go into the foam groove of the V shaped piece.
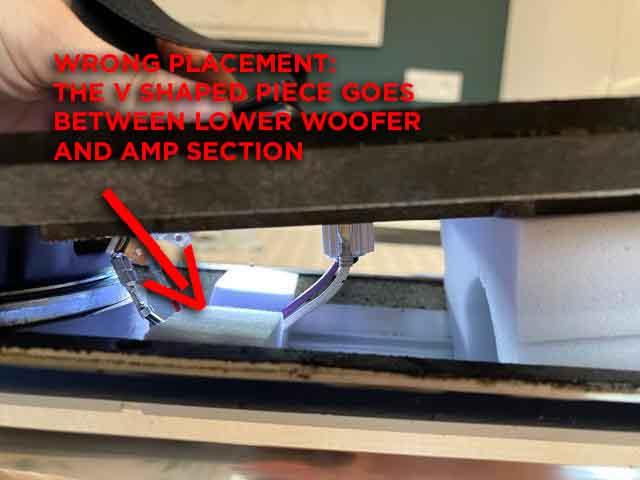
Correct placement of the foam pieces is are illustrated below. They should make a coffin for the two woofers.
Then, place the amplifier board, plug everything that need to:
- One plug between amplifier plate and speaker plate.
- 3 or 4 plugs between amplifier plate and cone.
Before closing the amplifier plate, add the remaining front base foam piece.
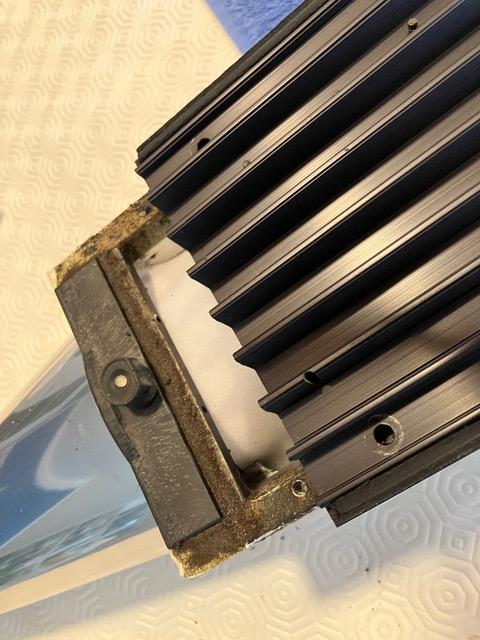
Close the speaker, tight all the screws (18) and check your new foam root proof Beolab 8000!
Hope this helps.
Found it, Thanks BeoFrederic, it will help.
Bought today two set of B&O white replacement foams: 10€ each.
Even for a raddish like me it do not worth spendind time for DIY’ing an alternative solution.
I will document the replacement operation here.
PS: at least here in Paris, the most complicated step was to find a dealer selling spare parts. Most of the dealers don’t do after sales and can’t order parts references.
Hi, Yes you deck was altered.
As far as I know, every B&O deck comes with DIN plugs and the 400x series for sure.
On the picture from Craigslist you can see it’s actually a DIN plug with a DIN to RCA adapter (note the two DINs one inside the other).If you need to put it back to original you should find wiring diagrams quite easily.
If RCAs are good to you, the same diagram can help you check they’ve been wired correctly.Hi Mark, Me again!
It happen I have two replacement relay already: some times ago I edited the BG4000 paperwork for a forum member and he gifted me in return with various part including two relays!
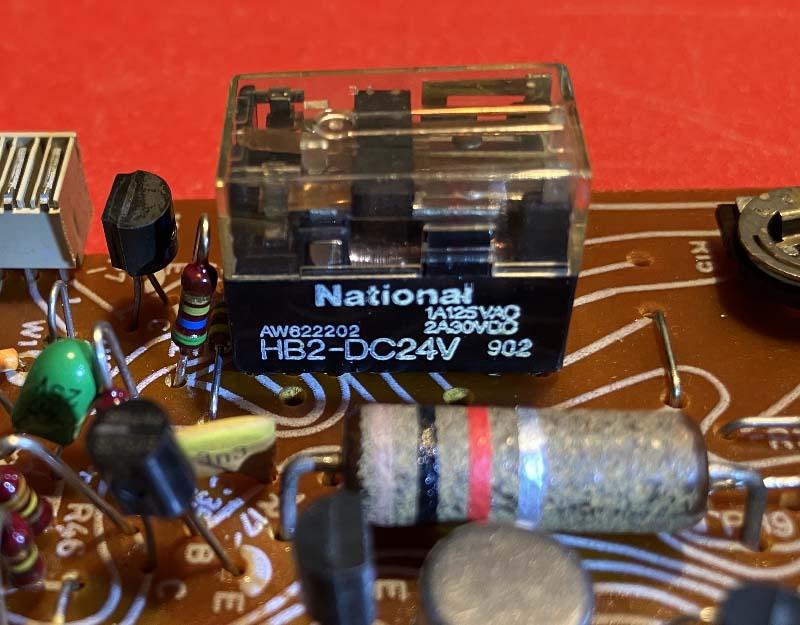
They seems to have the large footprint (Siemens) and my deck have National relays.
I remembrer they were a lot of holes on the PCB and I wonder if the PCB still have the traces to use the old relay or was the PCB completely redesigned?Do you know that? Thanks.
Ok, I can see now, National or Siemens, you avoid me a mistake in the rush!
– and of course it’s the one I need the most expensive 😀 –
Hi, me again,
I’ve taken out the main board just to see. The two speed trimmers where black of dirtiness like burned. I’ve cleaned them with contact cleaner. It make things a little better but not good still. Then I’ve looked at the relay: it means nothing but to looks quite clean and new.
Anyway, what concernes me is that the relay doesn’t look like those I’m use to see on other boards, it looks smaller and not consistent with the footprint of the usual replacement relay.
PS: I know whatever I do to play the clock I’ll need to change the relay, the trimmers and certainly other things, but I would fancy temporary fixes that also would make me understand how all this work.
Hi,
Models with the bigger clamper (the cover of the disc) are more recent.
If you’re that old fashioned and you also like cassette, you may want to look at the Ouverture (last models with big clamber, pretty rare I think or oldest)Stay away from a 3000 with small clamper, I feel it’s a doomed machine a sooner or later it will brick (again, that’s just my feeling)
3200 has a built in hard drive to save CD’s but at a very poor quality nowadays.
As for the speakers:
Foam rot is the disintegration of the internal damping material that melt and drip over the components and corrode them. On Beolab 4000 it can be avoid by selecting a pair beyond a certain serial number (15xxxxx IIRC).
Beolab 8000 are iconic indeed but first, thye’re very tall, they’re big and are floor standing so you need to think it. Second, there are various iterations of the model, MK1, MK2, MK1 early/Late… Well model with constant changes. I’ve got a pair of MK1 with cup woofer, so far it’s a dissapoinment: they have bass but it’s like if they lack attack. My 4000’s are more punchy. Seems like it’s what justify the evolution of the model. I beleive MK2 with dome woofer are more what people expect as rendering or at least me.
Finally, 8000’s are prone to foam rot and I dont know if this has been corrected over the years like it did for 4000’s.Will do that, Thank you.
That makes sense, thanks for the explanation.
The relay are quite difficult to source I believe.
Just to rule out that part and be sure, would it be possible to short some pins from the relay and check for speed stability.That’s a fast reply! Thanks.
Ok, I will look a this.
Just for my own knowledge: how is that?
I mean a relay is contact or no contact, haw can he create variations in speed?
Components like capacitors, resistors etc may have their characteristics evolving with heat, time… but a relay, it sticks or it don’t, right? How could he make the speed unstable?Thanks again.
Hi alls,
Now the OP problem is solved I’d like to add my case.
I’ have two BG4002, one (A) is spinning fine the other (B) not so much. The second (B) was wowing mostly in 45 rpm but now it wows also in 33 rpm. Note that it may be that wowing is more noticeable in 45 than 33 and was ever there.
I know I need to reinfuse the bearings as a starting point but frankly, I’m afraid of this step. So I tried another way.
I swapped parts between A and B: belt, motor, keyboard. B is still wowing.
I did’nt swap the main board because the BG are different types and on the B, there is one of those round flat orange capacitor that is not present on the A board. So there comes my questions:
- Can those old trimmers be responsible for fluctuations? I beleive they can cause imprecise adjustment but once they’re set, they’re set, right?
- what can, as th OP asked, cause fluctuations when the usual suspects (belt and motor) have been ruled out.
Thank you for your advices.
Hi,
If the question is “in the current range”, Beolab 18: That’s B&O, period. Maybe that 72-22.
If the question is “your favorite in what you own currently”, I think it is my Beosystem 1001 made of BM1001, BC1200, BC2200, BG4002, U70, S45-2 front/C30 Rear. Maybe my simple BC2300 with BL4000 that recently get a new shine compared to 8000’s.
Thank you for the comprehensive answer. Obviously note the one I was wishing the most!
I’m good to open them and what I fear is the glue the seems to hold the front panels.
I’ll do it as soon as I get or make new foam. In the meantime do you know if not using them will slow down the process (less heat) or as this nothing to do?
Perfect, all I wanted to know.
Thank you Kolfmaker.
I Will update the forum when I’ll do it.
Yes, I saw that.
But not in the movie or the web pages.
I reckon the 18’s are more photogenic than any other speaker but they’re also the oldest. - AuthorPosts
