Forum Replies Created
- AuthorPosts
-
I’ve always wondered, what is the material of those three, dark vertical panels?
That’s a very nice-looking setup and a great solution with those towel-hooks. The “now playing” area fills the empty space nicely.
Regarding the Beogram brackets: could you add a thin shelf on top of the brackets and then the Beogram on top? Perhaps a piece of glass? Although that might not look as slim as the floating-effect with just the bracket + Beogram. So perhaps the double-sided tape (or perhaps velcro for easier removal?) is still the easiest solution.
What’s the stand you are using for the Form1 headphones? The width looks pretty much spot-on and it looks great!
The shelfs and stands are one area of B&O products that I think are really under-appreciated (not to mention rare, unfortunately). Couple of years back I was lucky to find a “System Module SM50” for cheap for my 7000-setup. The stand is so sturdily built (needs to be!) and looks great with the whole stack on top!
I have a BC2, too, but it’s boxed away at the moment.
The specs mention that “Contrast on the display adjusts automatically to light conditions,ensuring that the display text can always be read easily” and a service bulletin lists as an issue: “The VFD display has an auto contrast function, if this fail, the light in the display can vary from very bright to almost black”. Perhaps you could try shining a light on the sensor (probably somewhere around the display) and see if the display adjusts any? If not, it’s possible that the VFD is just simply faded from use.
My unit also suffers from the aging soft-rubber surfaces, and my unit also has a faulty volume wheel (which is probably not repairable either and I haven’t bothered trying to find a replacement wing).
Either PMs or a method to send message to an email privately would suffice, IMO.
(Also; I was able to vote without being logged in?)
Back online – nice, thanks for all the effort!
There’s something odd about logging in; trying to access the My account page gives a “404 EROR” (yes, “eror” :D) but apparently I am logged in as I can post.
Testing: editing works. Topics started / total posts -counts seem to be off.
It should slide out, but if there is any battery leakage, it will make it stuck. Try pulling it with a small pick (under the edge of the tray) and hopefully it will come out with little persuation.
Hopefully they will re-appear as I recall they were quite useful.
I have at least some of the pics still, I can dig them up tomorrow if the archived thread doesn’t return.
I did get sound back for a while with a new speaker wire, but it didn’t last long (mechanical stress due to the movement with the alarm button) and I haven’t bothered to re-do the whole thing again.
It was just double-sided foam tape, couple mm. thick. It resembled the original and it felt like it would do the business.
To add into the BL7000 batteries; I just replaced the cells in my remote. The first set of NiMh AAs I bought were closer to 50mm in length and I couldn’t make it fit (battery cover couldn’t be closed anymore). My previous cells were closer to 48mm and that was still doable.
I bought new cells and this time I used 4/5AA length NiMh cells (43mm length). Naturally smaller cell means less capacity but these are still 1200 mAh which is more than the original NiCds that my remote had (700mAh).
This was much easier fit! Wide strip of capton tape at the ends in attempt to prevent any future leakage from reaching the board.
I also wanted to share this link I found: a very polished site about all sorts of BL7000 repairs: https://leicht.io/beolink/7000/articles
First of all, thank you Lee and Keith for all the work in the background over the years.
Whatever the future holds for Beoworld, I just hope it would NOT mean (secondly after a total closure of course) another new forum with new accounts and a third archived forum. It’s already way too hard to search for stuff (on all the three forums) and the current forum is -sorry to say- very basic.
I do see the possible issues, but partly I am hoping that perhaps B&O themselves could somehow help here. Surely they see the community value that Beoworld has for the brand.
I received mine almost two weeks ago, here’s finally my two cents on the product (it’s awesome!).
Here are the contents of the kit waiting for assembly:
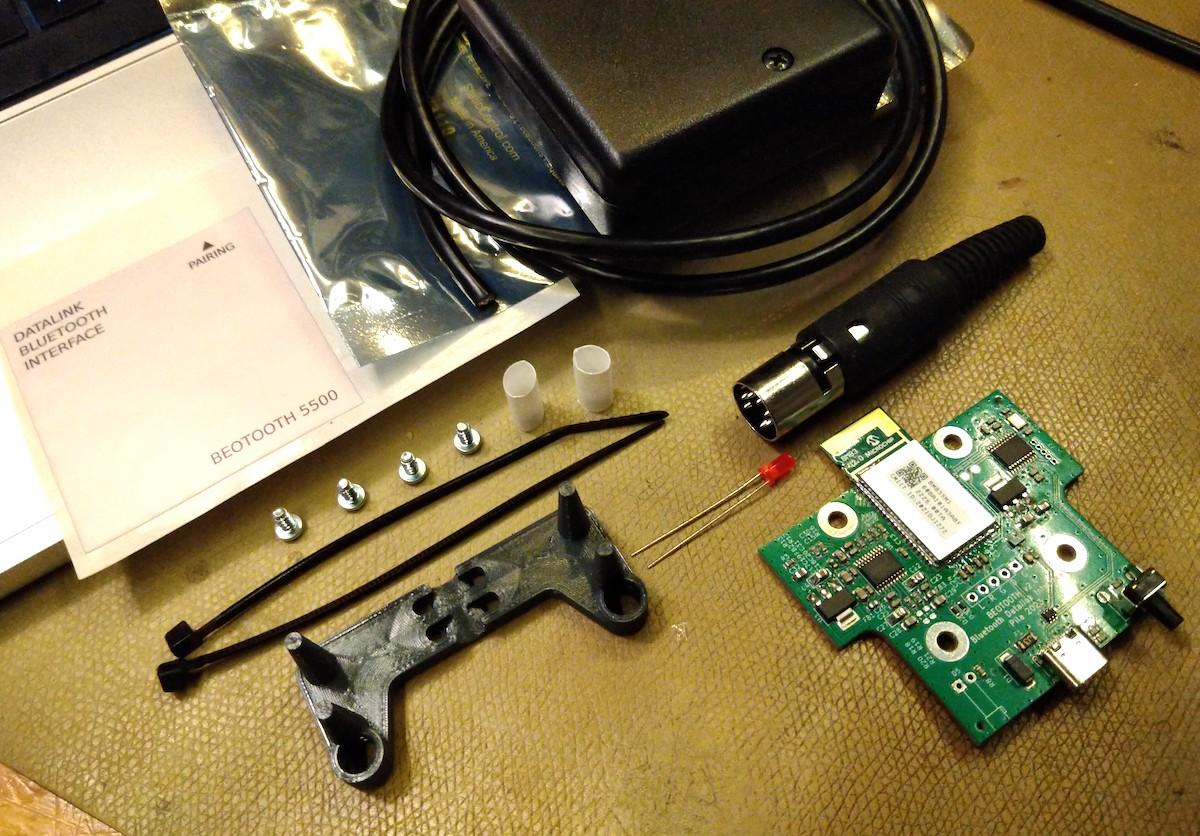
The assembly is described in detail in the supplied manual. Basically it’s just soldering the cable (connector and PCB) and the LED and fitting it all inside the case. If you have never soldered a DIN connector it can be a bit tricky at first but that’s really the hardest part. Using a small flat-top LED and a custom 3D-printed cable holder / strain relief really shows the attention to detail of the kit (fun fact: during playback the LED flashes to match the real Beocord’s track indicator).
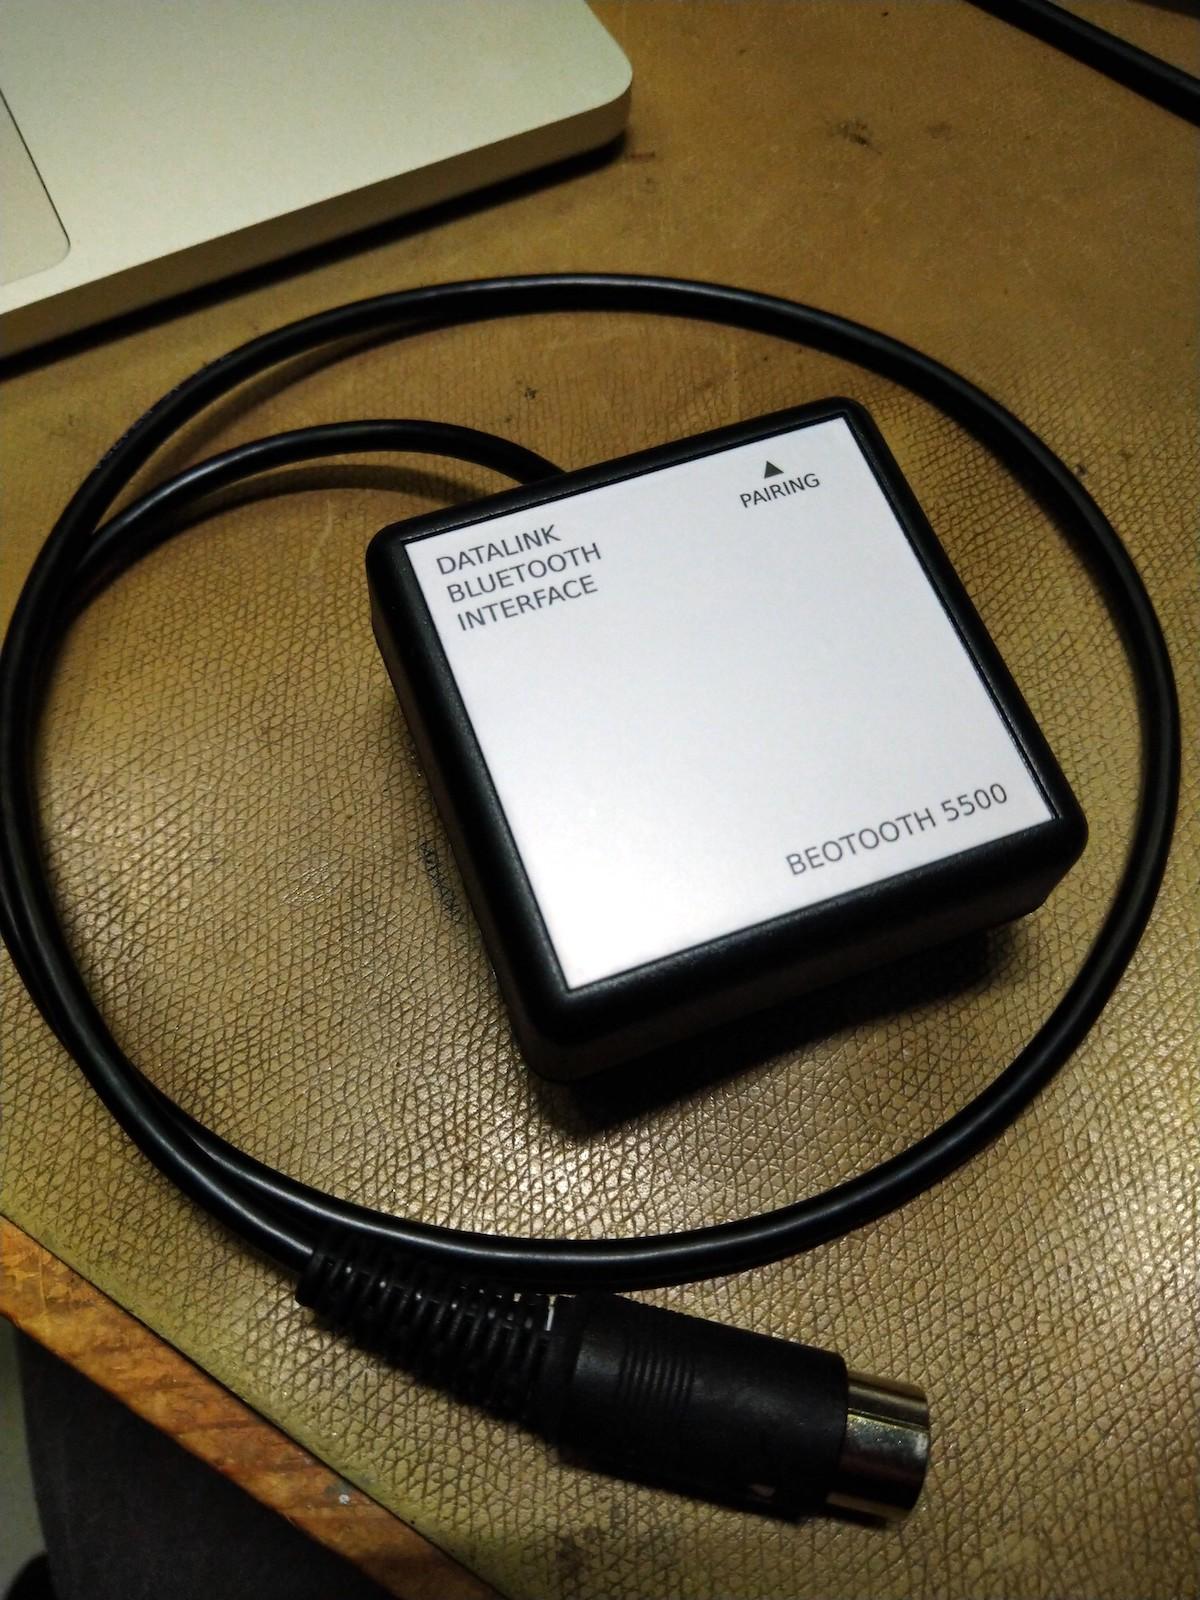
The finished product has a very B&O’ish style (perhaps reminding of the LC1 with a silver top and a black plastic case).
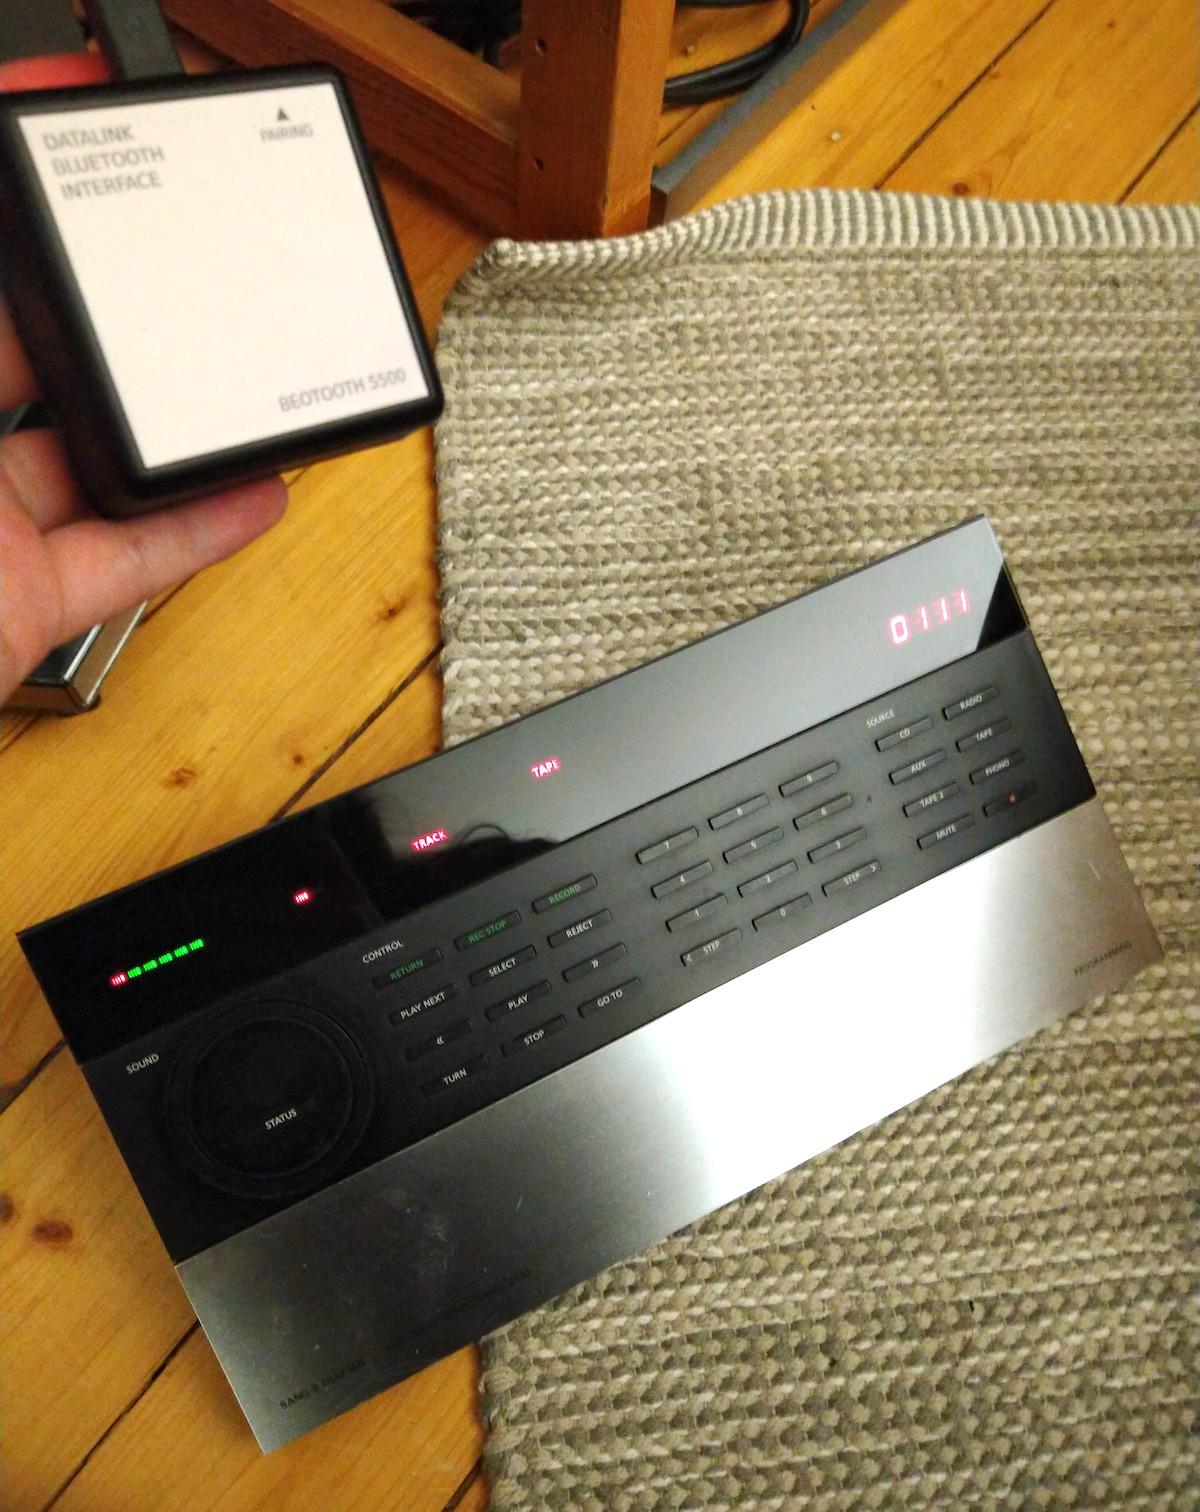
Here connected to my BM7000’s TAPE1 and showing the time display real-time on the MCP6500. I have a weak spot for the 2-way remotes and I really like how the Beotooth supports that! (This also lead me to finally building a new battery pack for my BL7000). I am also hoping to experiment using the Beotooth over MCL2 in a link room (with 2-way comms).
I had prompt replies from pilatomic and he even made two firmware updates regarding some small things I observed in my testing (difference between STOP and PAUSE commands in certain situations and a small issue with rewind/fast forward commands), so customer support was also really top notch. Also a note that not all apps that control playback over Bluetooth are not created equal (my phone’s default media app had inconsistent issues with playback controls working or not whereas my MacBook+iTunes always worked flawlessly).
This is a very useful little addition to any Datalink-equipped BM/BC. While using a Bluetooth receiver for audio on a vintage system is nothing new, the Beotooth does it well and the seemingly small addition of Datalink commands really makes it feel so much more integrated. Especially on pilatomic’s level of detail on everything.
I hope we will see more DIY-projects utilizing the Datalink bus in the future for something neat that keeps adding to the magic of B&O’s truly ageless designs.
@jfrancis49: that sounds like a neat solution. Have you got any photos of the end result?
I was thinking that one option might be 3D-printing with TPU. I am not sure how well it would survive in long term, but that would eliminate the splicing.
VERY nice! I’d be surely interested in buying (either pre-made or kit-form, latter preferred) at least a couple!
No worries ?
Unfortunately I don’t have access to the speakers now (I sold the BV3000s and upgraded to BL45000s which are the same size but are currently in storage) so I can’t check.
However as the BV3000 specs say the speakers are 45 x 38 x 8cm (W x H x D) one could perhaps approximate the size of the foams form that. I think they had a white fabric on the outside but felt like foam on the insde.
There is also a foam tape -like gasket. It’s the black tape on the first picture and green on the second as I had replaced it. Not sure if totally necessary but the old stuff was crumbling and I had something close-enough at hand to put in there.
Are you trying to make new acoustic foams?
If you mean front panel (cloth) removed, there will be only the two speaker elements (second picture here) visible.
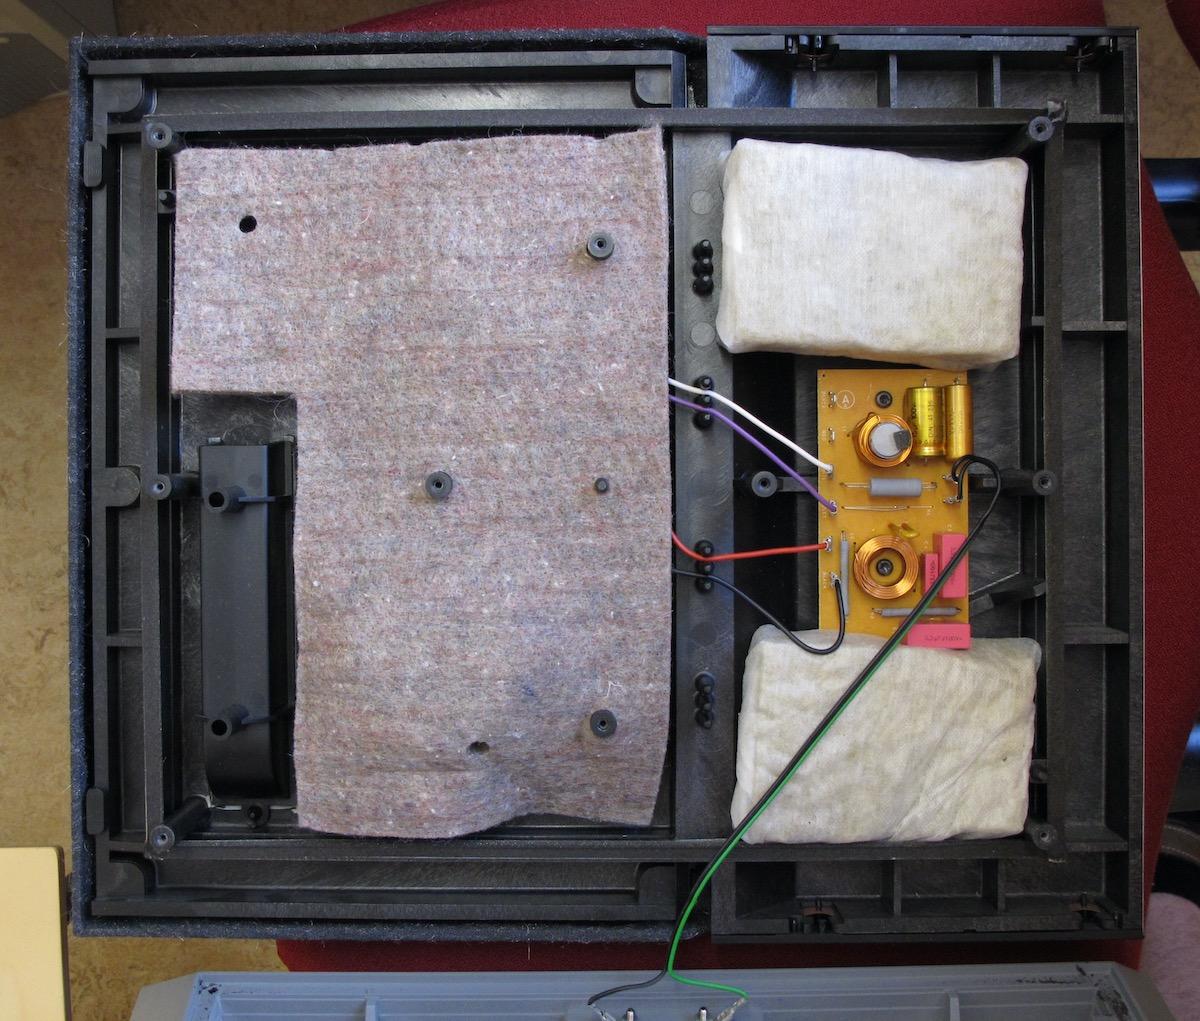
If you mean back cover removed, here are some pictures from when I recapped mine. These are Beovox 3000 Type 6716.
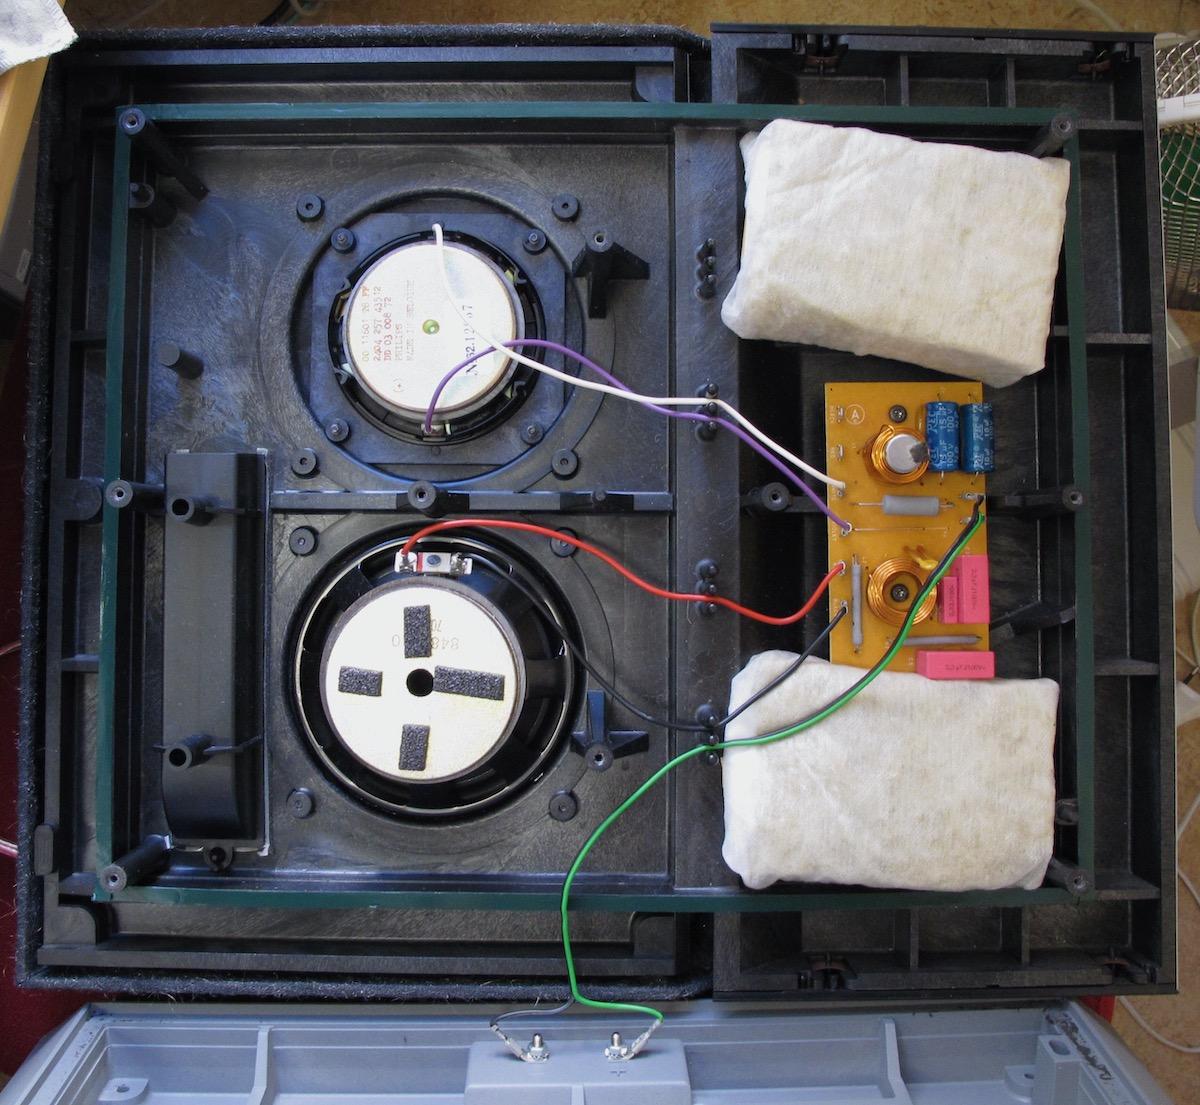
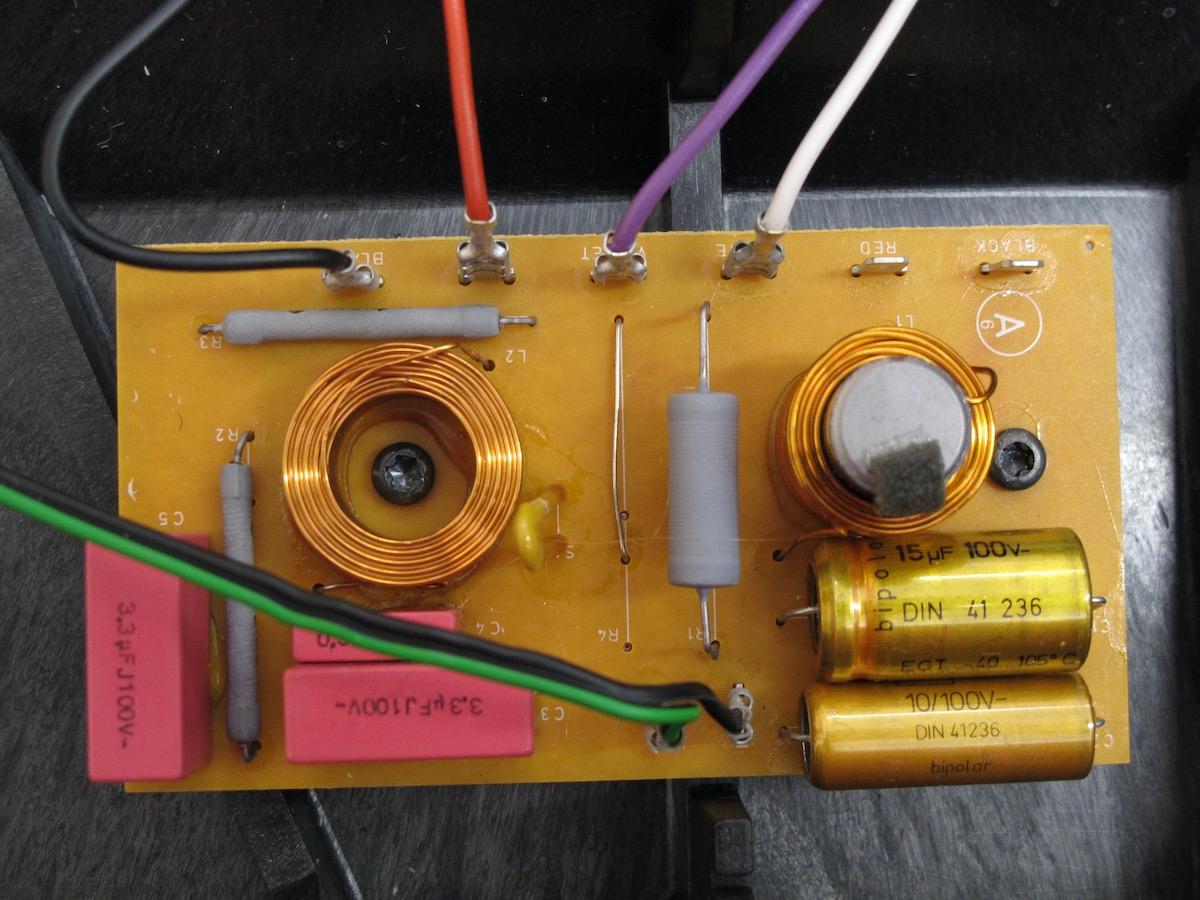
I did had a quick search and found this: https://www.partco.fi/en/electronic-components/passives/resistors/flame-proof-resistors/12325-fres-05w-5r6.html … so I’ll either go for that or the TE Connectivity one that I linked to earlier.
Ha, Partco is my local (finnish) component dealer and this is the exact part I bought and where I got the part earlier 😀 I guess they do ship abroad too, but it might get costly…
(Again; I am not sure if this is 100% perfect part for this, but as the service manual doesn’t really give any details and the listing says flame-proof it sounded good to me and I used it for testing and was mostly astonished to find the LC2 working again with only this fix).
Lausvi, your avatar rocks…
Ha, thanks! 🙂
Thanks for that Lausvi – sounds promising! R3 is also 5.6 Ohms but it’s on the top side of the board near that white bridging wire (hidden by the IR module in my first picture). Did you find/fit a flameproof equivalent/replacement?
Ah, now I had a look at the schematics and indeed there were two 5.6 ohm resistors. I believe I had to remove the IR module to get access…
My local dealer had one listed as a ‘flame proof resistor’, which appears to be a SPRX1/2 by Koa. The datasheet states: ‘fixed metal film, Flameproof, Ceramic Body, Flame Retardant Coating”. This was as good as I could get at the time.
In any case neither of the LC2s are in use, and I was planning to recap those anyway if I were to use them again…
I’ve had two cases of a dead LC2, and both times it was the 5.6ohm resistor (although my notes say R3?) that had gone open. No burn marks or anything. Both units work now.
Hi – and welcome to Beoworld!
The bog standard 9V adaptor should work. I’ve heard 9V 2A been recommended (the original as pictured, appears to be rated at 500mA). The plug should be center positive, and physically it should be slim as otherwise it won’t fit into the crevice.
I believe there was no circuitry inside the stand, so you should be able to verify if the 9V is going to the contacts on the top of the stand.
Thanks! And extra thanks for doing the schematic!
I’ll need to get the rest of my LC1s out and check those diodes! I had luck reviving at least three I think by just replacing the lithium battery.
- AuthorPosts
