Forum Replies Created
- AuthorPosts
-
I have tried Link option 1-6 and do not see any change in behaviour no matter which one I choose, so I am not sure if the options settings does anything for this particular setup.
For the BL1615 it may also be worth trying V.OPT settings, as that is what you would do if there was a connected TV.
Great result – thanks for posting.
Perhaps if the audio was fed into a Playmaker, auto-sense on its line-in could switch on connected PL speakers and you would have Beo4 volume control also? You’d probably need the PM in A.OPT 4 so that it will respond to the ‘link mode’ volume commands that are used to activate the BL1615, and you’d have to avoid the A.MEM command as this would put the PM into Airplay mode.
If the PM works then maybe Essence would be similar.
I have just replaced the battery in the electronically similar BC2300 – see thread here:
https://beoworld.dev.idslogic.net/forums/topic/beosound-ouverture-cd-not-working/page/2/#post-29315
But after seeing your picture I may speed up battery replacement in my other similar aged B&O devices.
Yes it’s strange that it refers you back to a section that is made out of date by the CDM modification. Looking at the circuit diagram for the new CD interface board (PCB89) I can’t see anything that is adjustable anyway. Nor is there anything adjustable on the CD Servo and Decoder board – PCB88.
I think your Ouverture and my BC2300 share the same board, like the one for sale here: https://www.ebay.co.uk/itm/375101801373
Further to all the excellent advice above, you will see from the picture of my similar BC9500 below that all the cables and connections should be routed through the front edge of the BeoCenter, thus allowing it to pivot forward and upwards freely:
(Note that it was opened up with the CD/Tape doors closed – the doors were then opened whilst in the service postion)
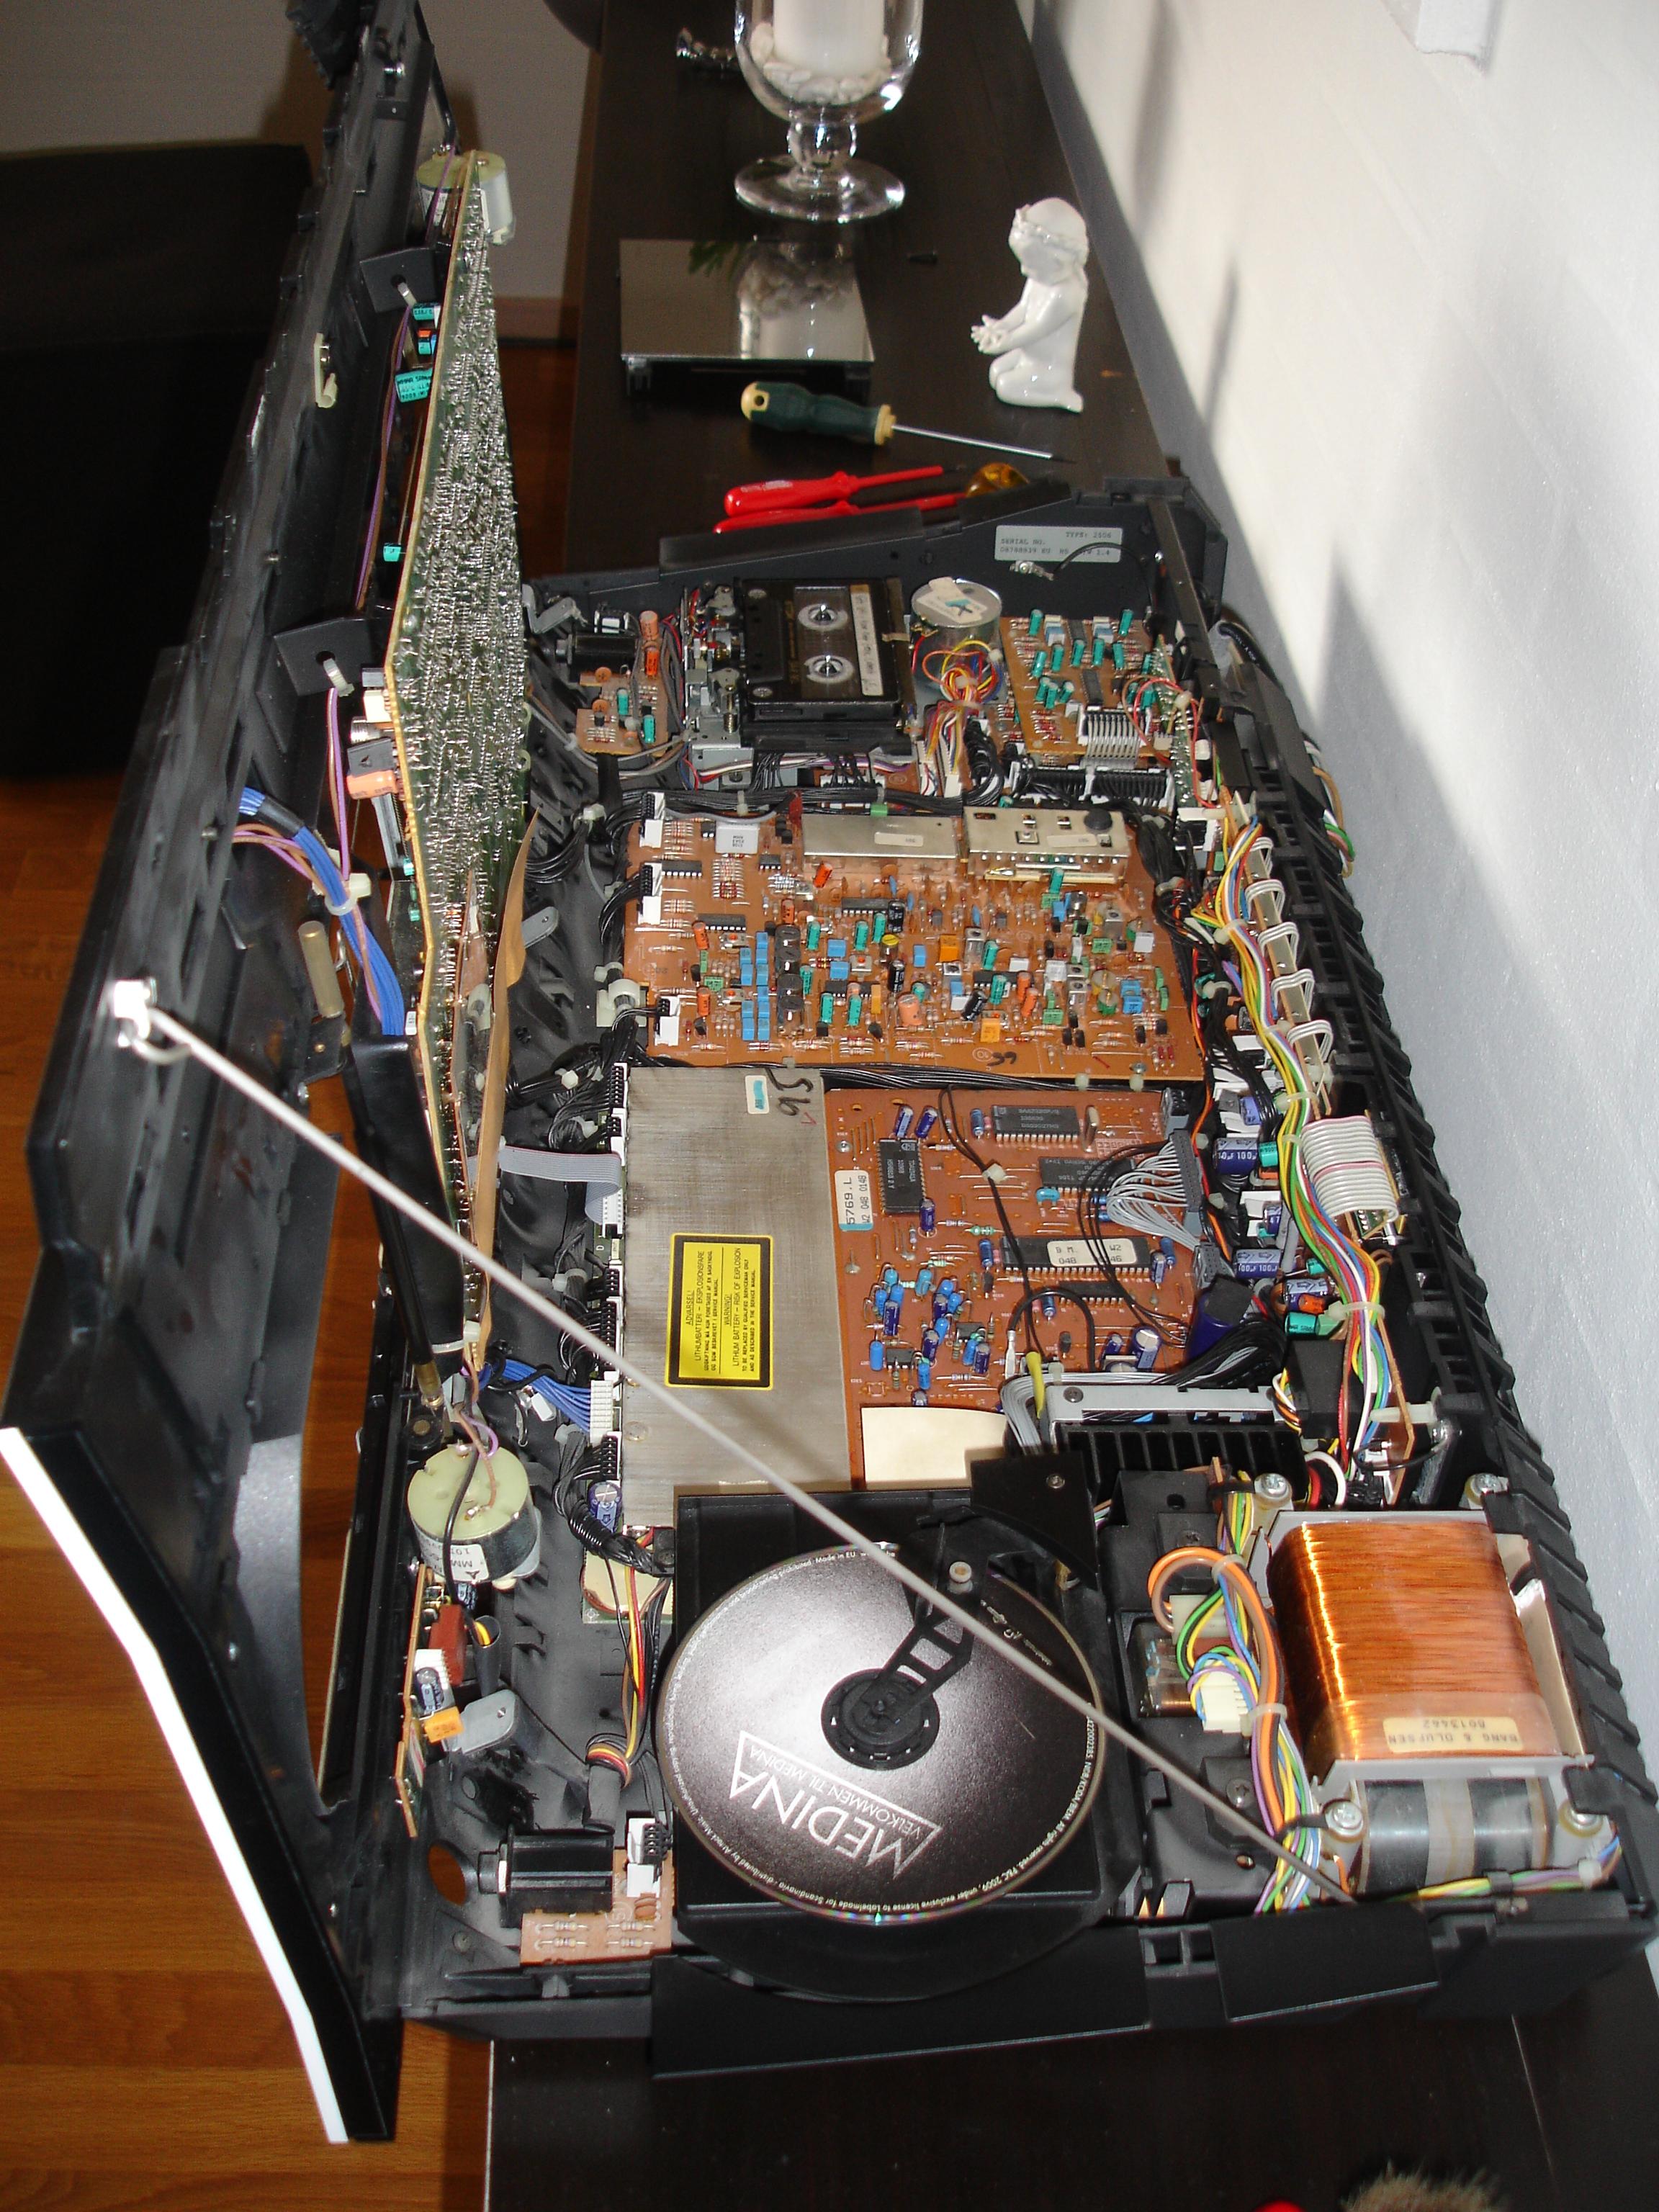
I assume from the earlier thread that you have access to the ‘special’ Beo4 remote hence are able to get the REG2 command to show.
I too am not sure what is meant by ‘disconnect the DVB-T module’, but if you look at this FAQ it describes the DVB-T in some detail which may enable you to work out how to disconnect.
To add SHIFT to the Beo4:
– Press Power (Red Button) and LIST together, the display should read ADD?
– Press GO.
– Press LIST until the display shows SHIFT then GO.
– SHIFT should then be listed under LIST
2 April 2024 at 12:12 in reply to: DVB-T2 HEVC external receiver compatible with BV7-55 and Beo4 #54040I am not sure why is says it’s made for Scandinavia, but perhaps this would work:
https://shop.oneremote.dk/shop/69102-bo-dvb-t2-aerial/4171-dvb-t2-iii-boxer-tv-modtager/
But if there is a Humax box in your PUC/STB list then I would look for a Humax DVB-T2 receiver as suggested above. I used a Humax HD-FOX-T2 for many years with my BV3 and then BV6-26. There is also the HDR version for recording – lots available on Uk eBay who may post to Italy.
2 April 2024 at 02:48 in reply to: DVB-T2 HEVC external receiver compatible with BV7-55 and Beo4 #54042In Scandinavia we do not use the HEVC codec/compression. A Danish T2 receiver does not work in e.g. Italy or Germany unless you can read in the specs that HEVC is supported….
I see. I just had a look at the spec for my HD-FOX-T2 and I don’t think HEVC is supported. Looking at Humax’s Italian website this model would work: https://it.humaxdigital.com/product/digimax-t2/
It has IR remote which is supposed to be a learning remote, but I doubt it would learn the B&O IR frequencies. You could get lucky and find that it is controlled by one of the older Humax IR PUC/STBs.
1 April 2024 at 10:52 in reply to: BM6500 / 7000 Powerlink – Attenuated Speaker or True Pre-Amp Out? #54009Hi and welcome to Beoworld!
I had a look at the circuit diagram (available to paid members) and the Powerlink Outputs are taken from the pre-amp stage (after input select, vol/tone control and muting). They do not go through the ‘Output Amplifier’ which supplies the speaker outputs.
A further non-tech suggestion: If you find a CD that plays (preferably one with lots of tracks and close to the max 74 minutes playing time), play it repeatedly and move back and forward through the tracks. This may ‘free up’ the laser mechanism (focus or radial tracking) if that is the problem – it could be sticky from age or lack of use. Then try a CD that didn’t work before.
Hi and welcome to Beoworld!
The Beosound 4000 was called the BeoSound Ouverture in Europe, so maybe this thread can help you out:https://beoworld.dev.idslogic.net/forums/topic/beosound-ouverture-cd-not-working/
Before we an assist, it would be useful to know your technical expertise; are you happy to dismantle, replace electronic components?
Based on my experience/reading to-date, I would probably try the following in order:
- Cleaning of the laser lens – opinions vary on the best way to do this but isopropyl alcohol works for many – have a wider search of the forum. (There has also been success with a deep clean of the laser, but this would involve quite tricky dismantling)
- Running the CD Test modes to see if this frees up the laser mechanism (I had success with a BeoSound 1 using this method). The Test Mode can also tell you more about the CD fault.
- Replacing the laser (tech expertise required)
- Replacing capacitors on the CD driver board (tech expertise required)
It could be worth trying capacitor replacement before laser replacement.
We have tech manuals available for paid site members if you are happy to go down that route, or know someone who is.
All back together now …
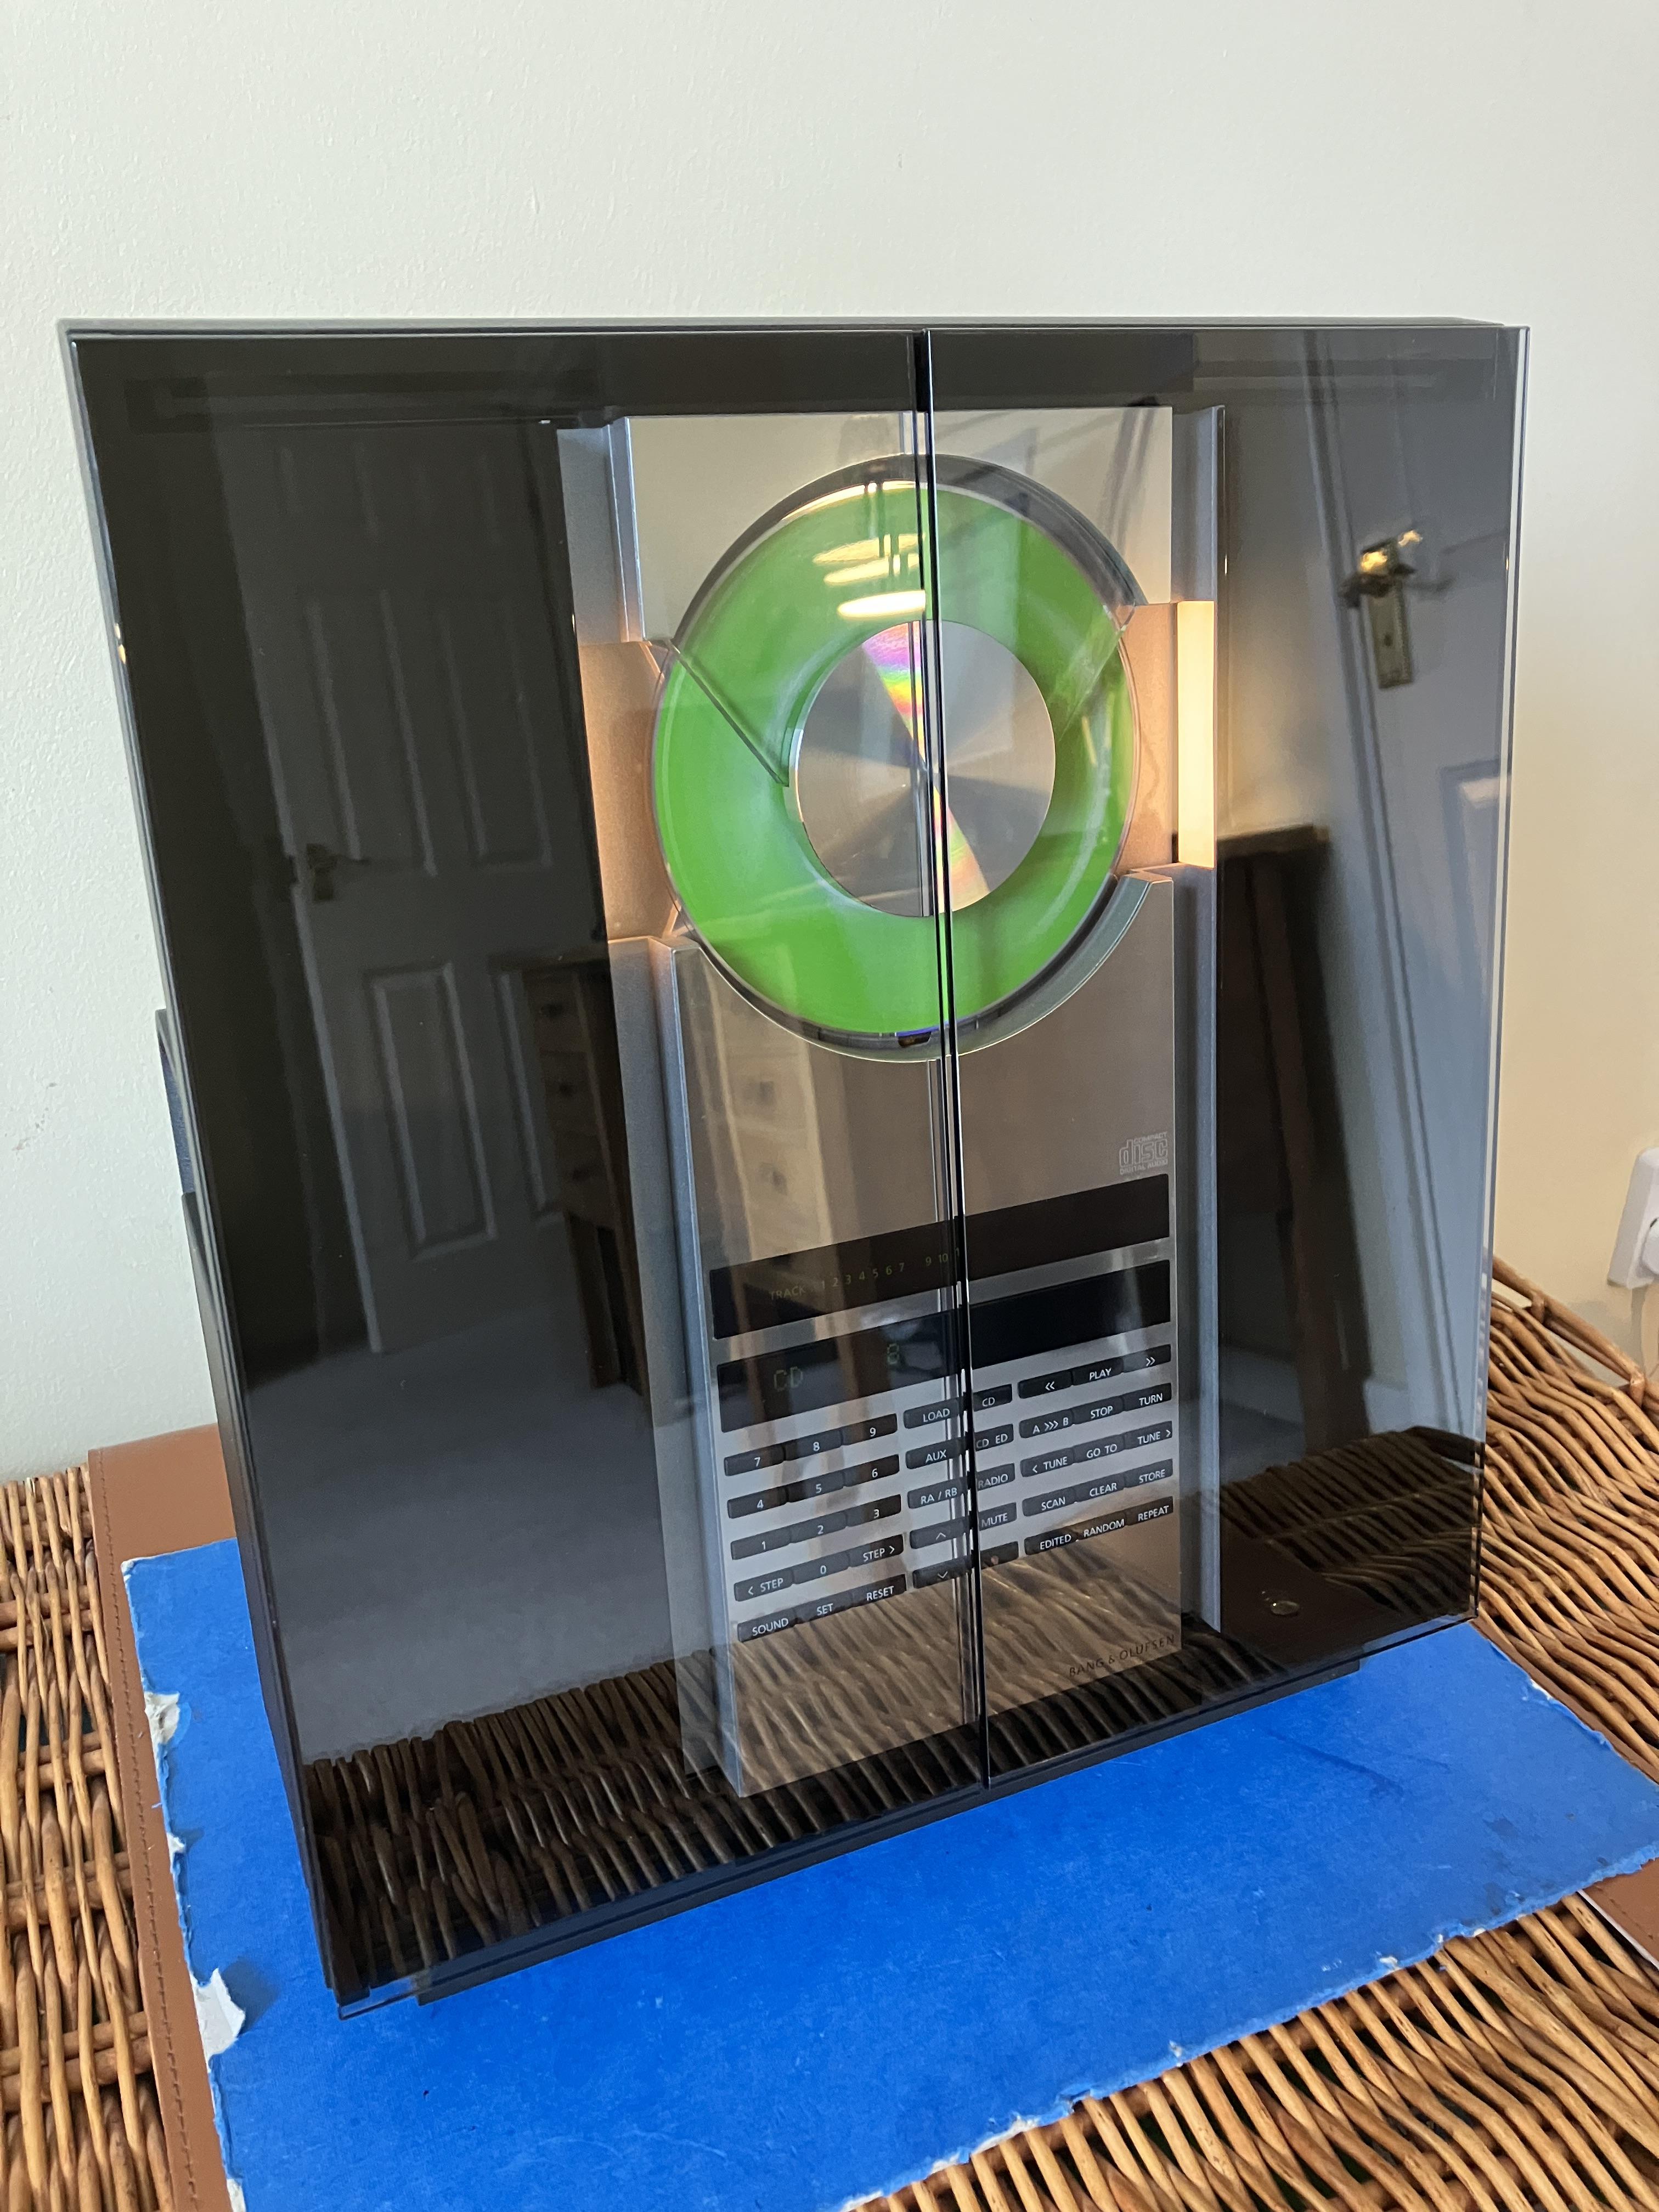
^ Funny you should ask – I actually did it yesterday!
Here’s a quick photo of the display board removed for access – the two adjustments are circled in red (one for each display panel):
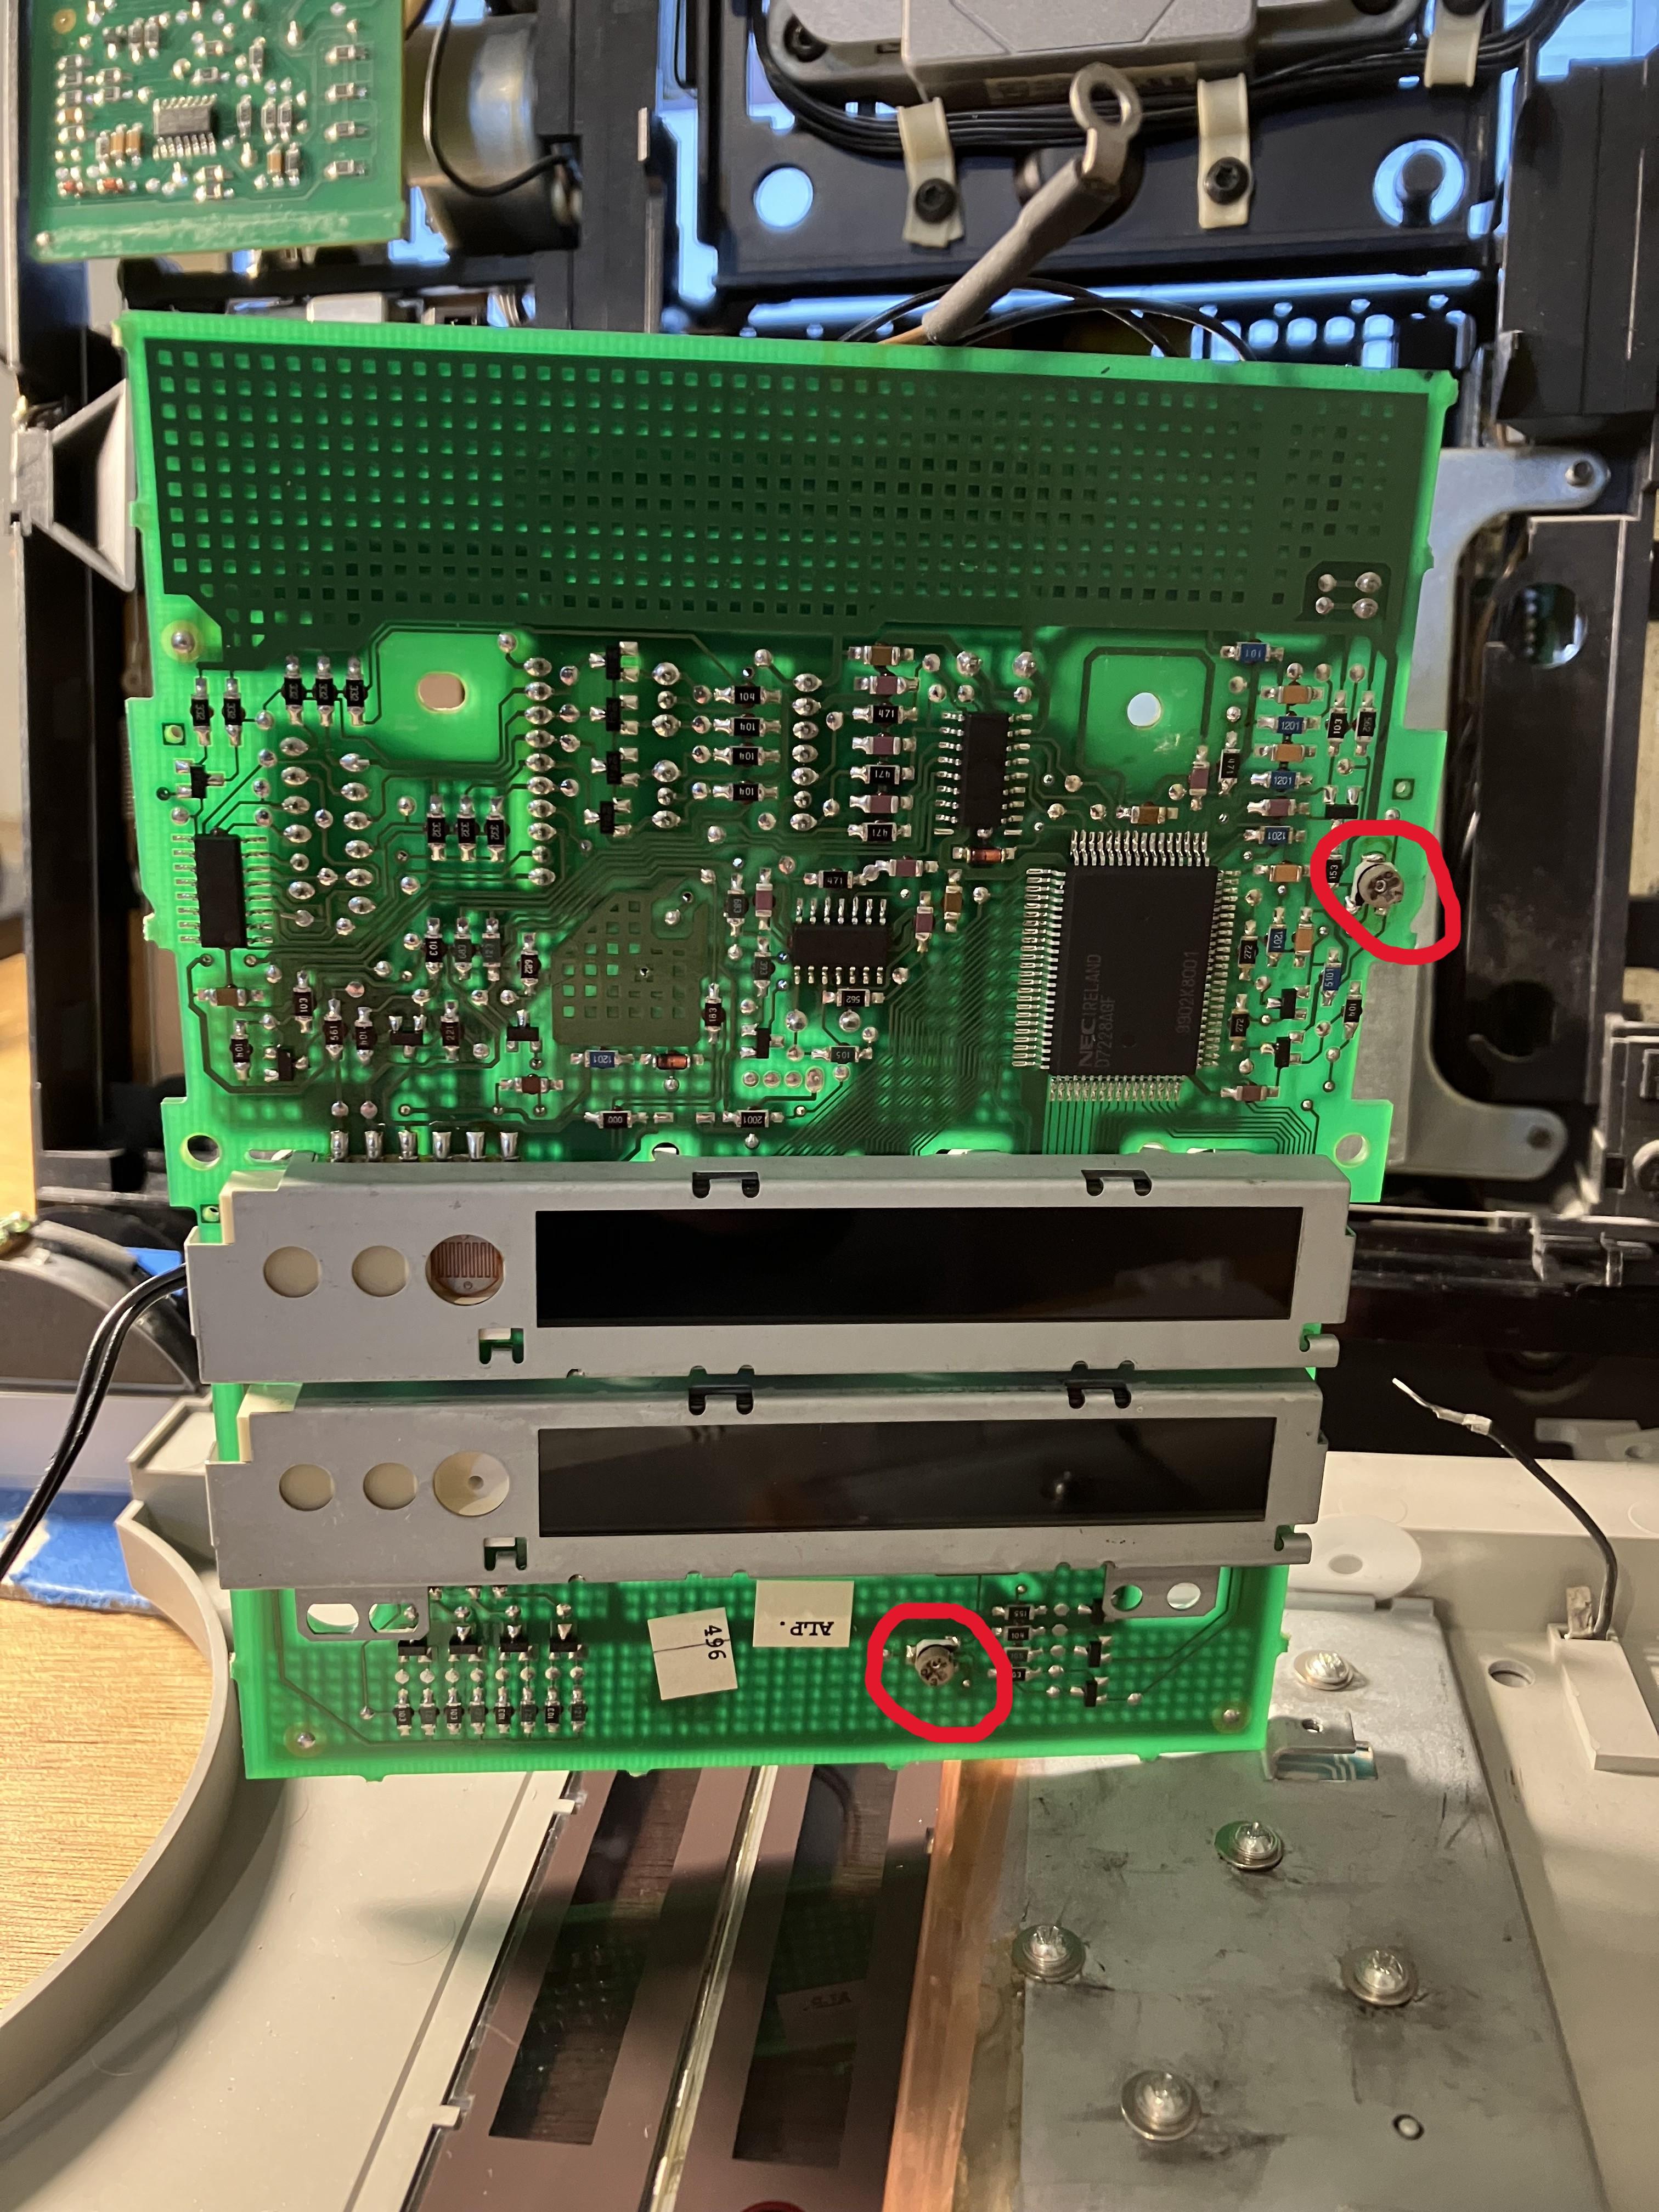
I actually reconnected and powered it up to adjust. This is a bit tricky because you need to spin up the CD to get the track numbers to chow on the upper display – I pressed my finger lightly against the CD centre to keep it in place for initial ‘spin up’.
The potentiometers will actually turn through 360 degrees past the maximum point, hence needing to have the display powered for adjustment. I set mine to maximum, which is fine if you view the display head-on, but there is too much surrounding glow if you view from an angle. So I may well turn mine back down again before re-assembly.
EDIT: Some spotters may have noticed the rather ‘Heath Robinson’ screws at the bottom of the photo above. These are fixing the rear of the keypad in place, and came as part of the official B&O keypad repair kit (new dome foil etc) that was my very first ever B&O repair back in 2008.
Quick photo of display with contrast too high (do I mean too low?) – only BBC R2, RADIO A and STEREO should be visible! It is much better viewed direct on, rather than at an angle.
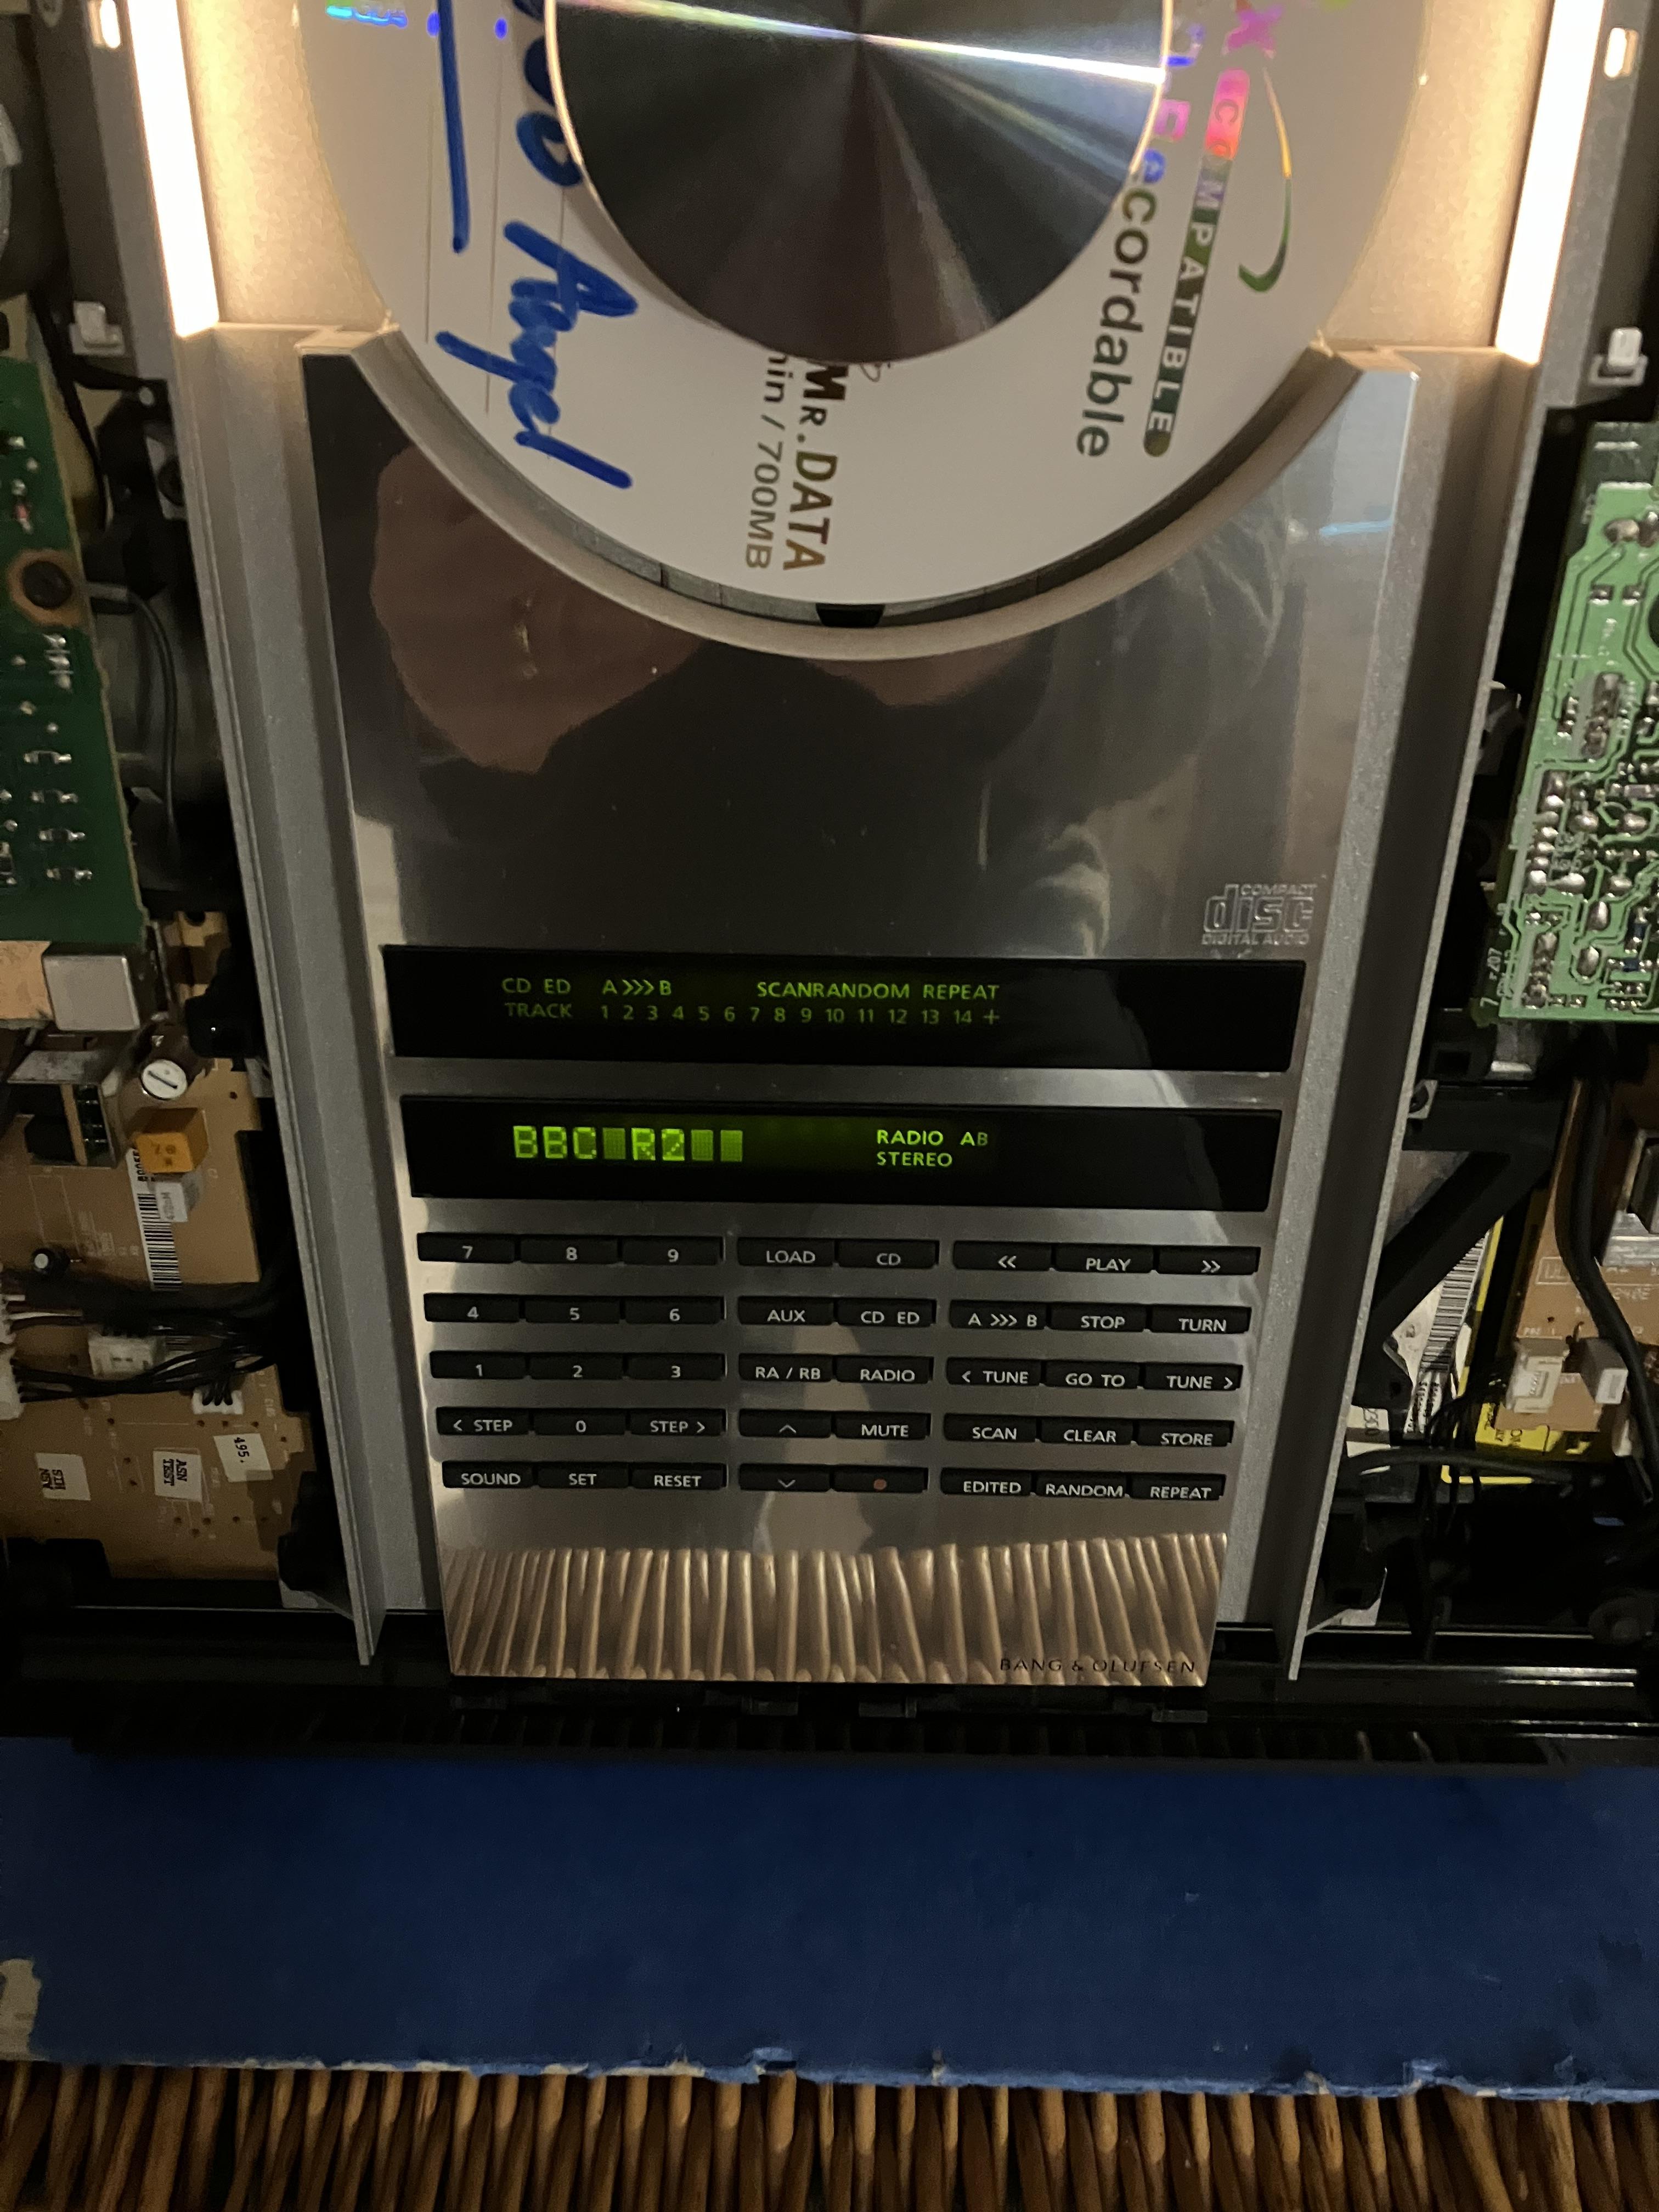
I am now able to check my display in the dark and it is far too bright! (the non-lit ‘pixels’ are glowing too much which reduces clarity). I’ll re-adjust tomorrow, probably back to where I started. It’s a bit of a faff to adjust so I actually wish I’d never attempted. So if you can live with yours as it is then I recommend doing nothing!
On a positive note, I replaced both belts today – first time I have tried that and it was a bit tricky but successful. I also replaced the lithium battery – I (carefully) soldered a new battery directly rather than use a socket because the sockets I bought were a bit large and may have pushed against the upper shielding. Given that this is the first battery change in 20+ years I reckon that the replacement will probably outlive me. (Old battery measured 2.86V no load, new one was 3.2V).
I had to adjust the FM offset after the battery change. This didn’t work the first few times and I think there may be an error in the manual. It tells you to use TESTMODE, tune to a known station and then press GOTO, input correct freq then press STORE. I found that I had to press STORE twice before the display would show OK and it would register. I haven’t bothered with AM offset. (EDIT: I just checked Talk Sport on 1053kHz and it worked fine, so no need to adjust)
So other than re-adjusting the screen brightness and re-assembling I am finished. Apologies for hijacking madskp’s thread for the non-CD-related activities but I wish him all success in getting his Ouverture fully functional.
So after a month of not working on my BC2300 I have today dug out my soldering iron and replaced the CD driver board capacitors.
Board after removal of SMDs:
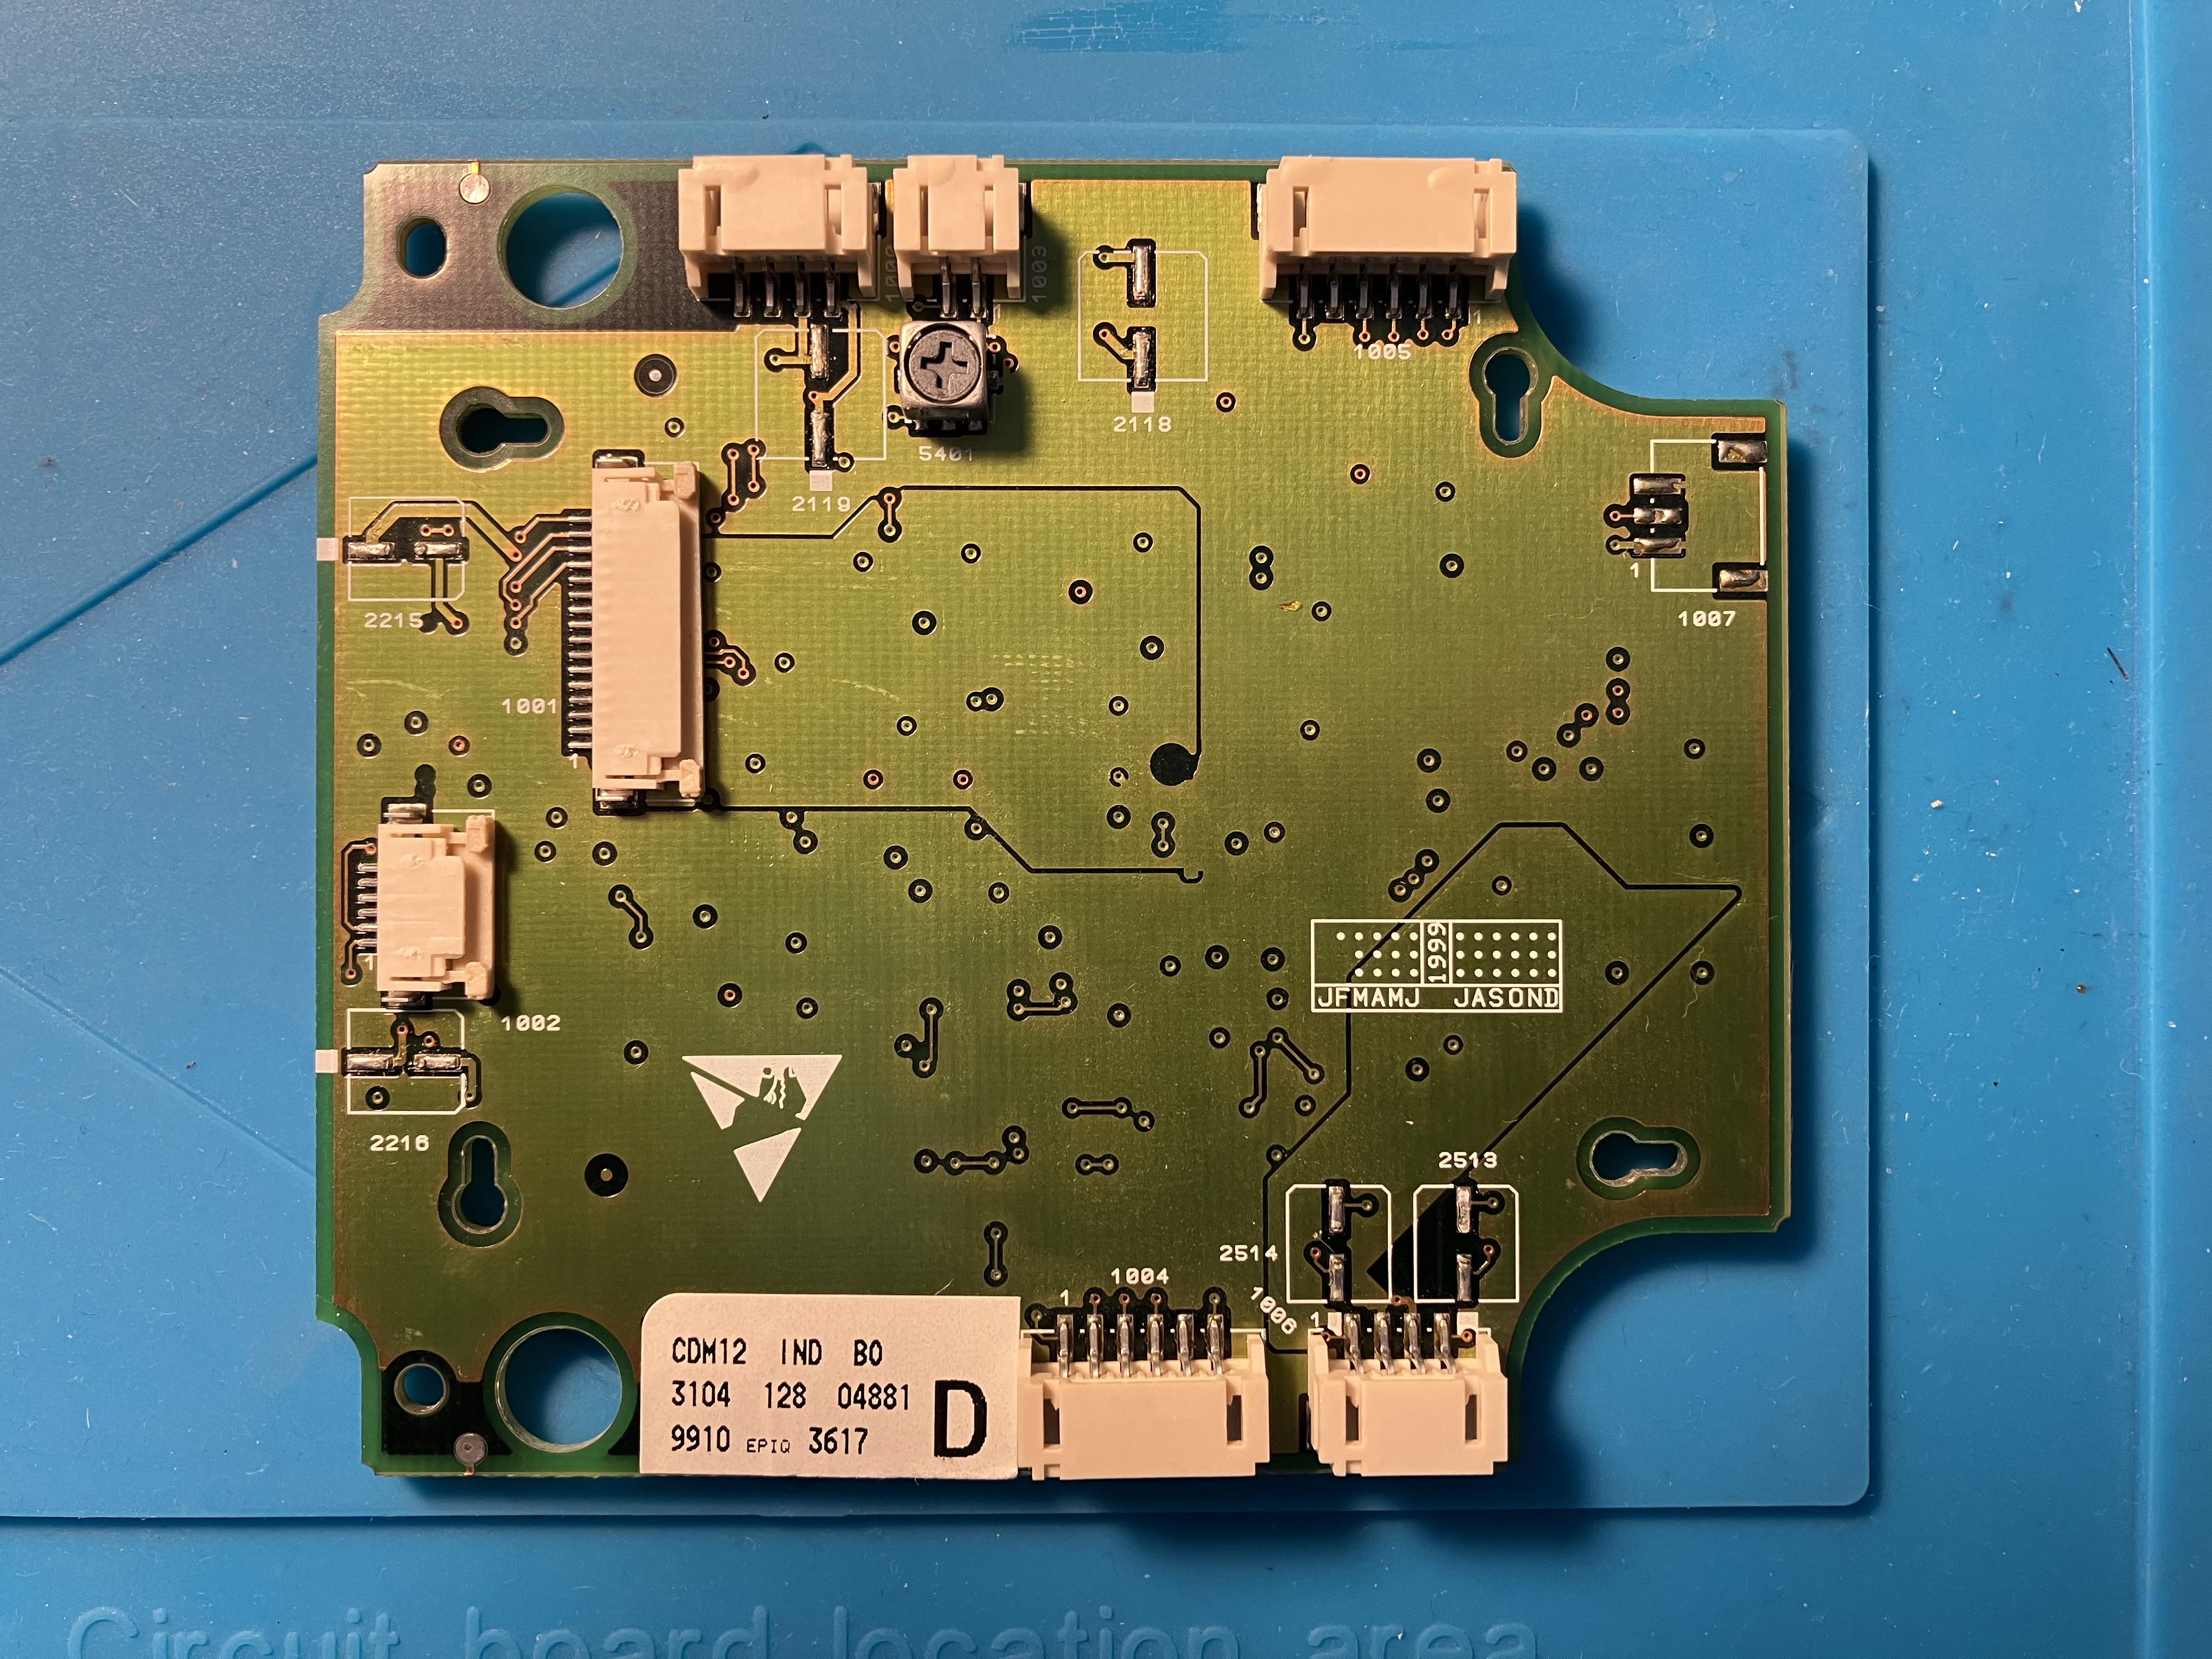
And with the new capacitors, all Panasonic apart from the (blue) 330 uF which is a VISHAY. I had to be very careful to orientate the capacitors so that they do not interfere with the CD laser movement. The large VISHAY was tricky and I had to bend both legs into an L-shape in the same direction, soldering the hidden +ve foot first and then bending it forward to solder the -ve lead. It now fits nicely into a groove in the side of the CD mechanism.
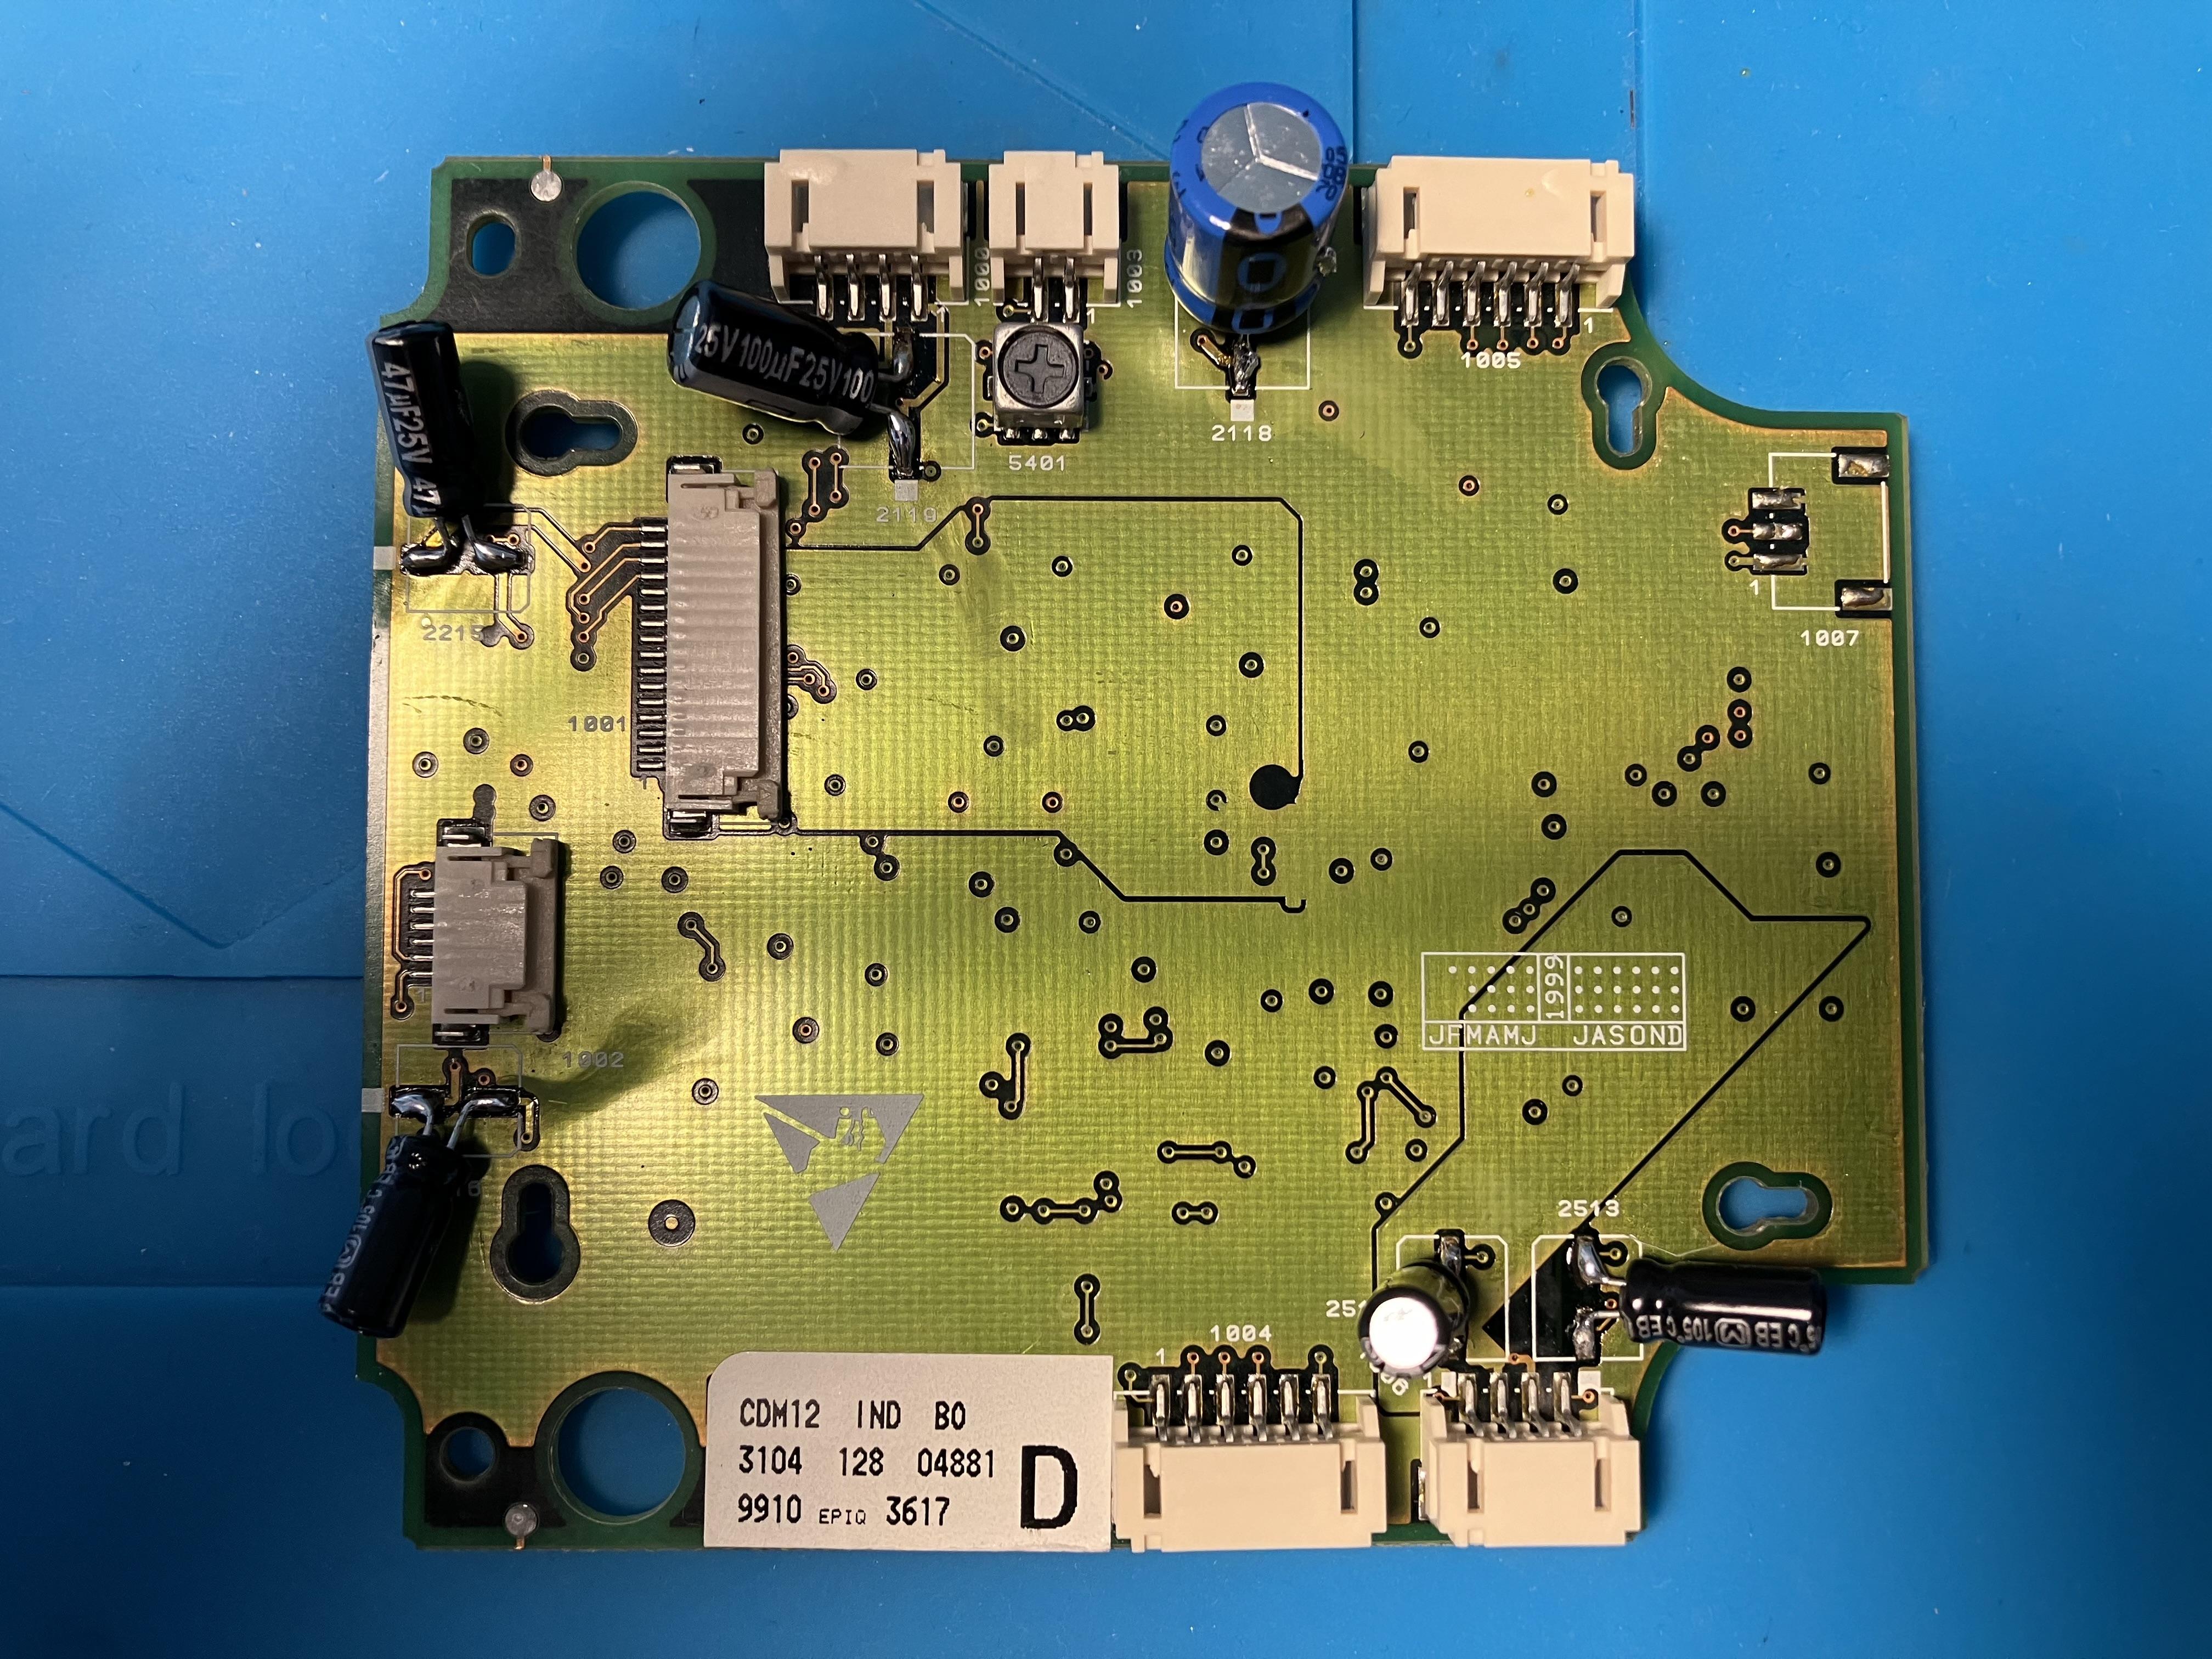
And guess what? I put it back together and it works, and for more than 20 minutes this time!! It is a Good Friday! ?
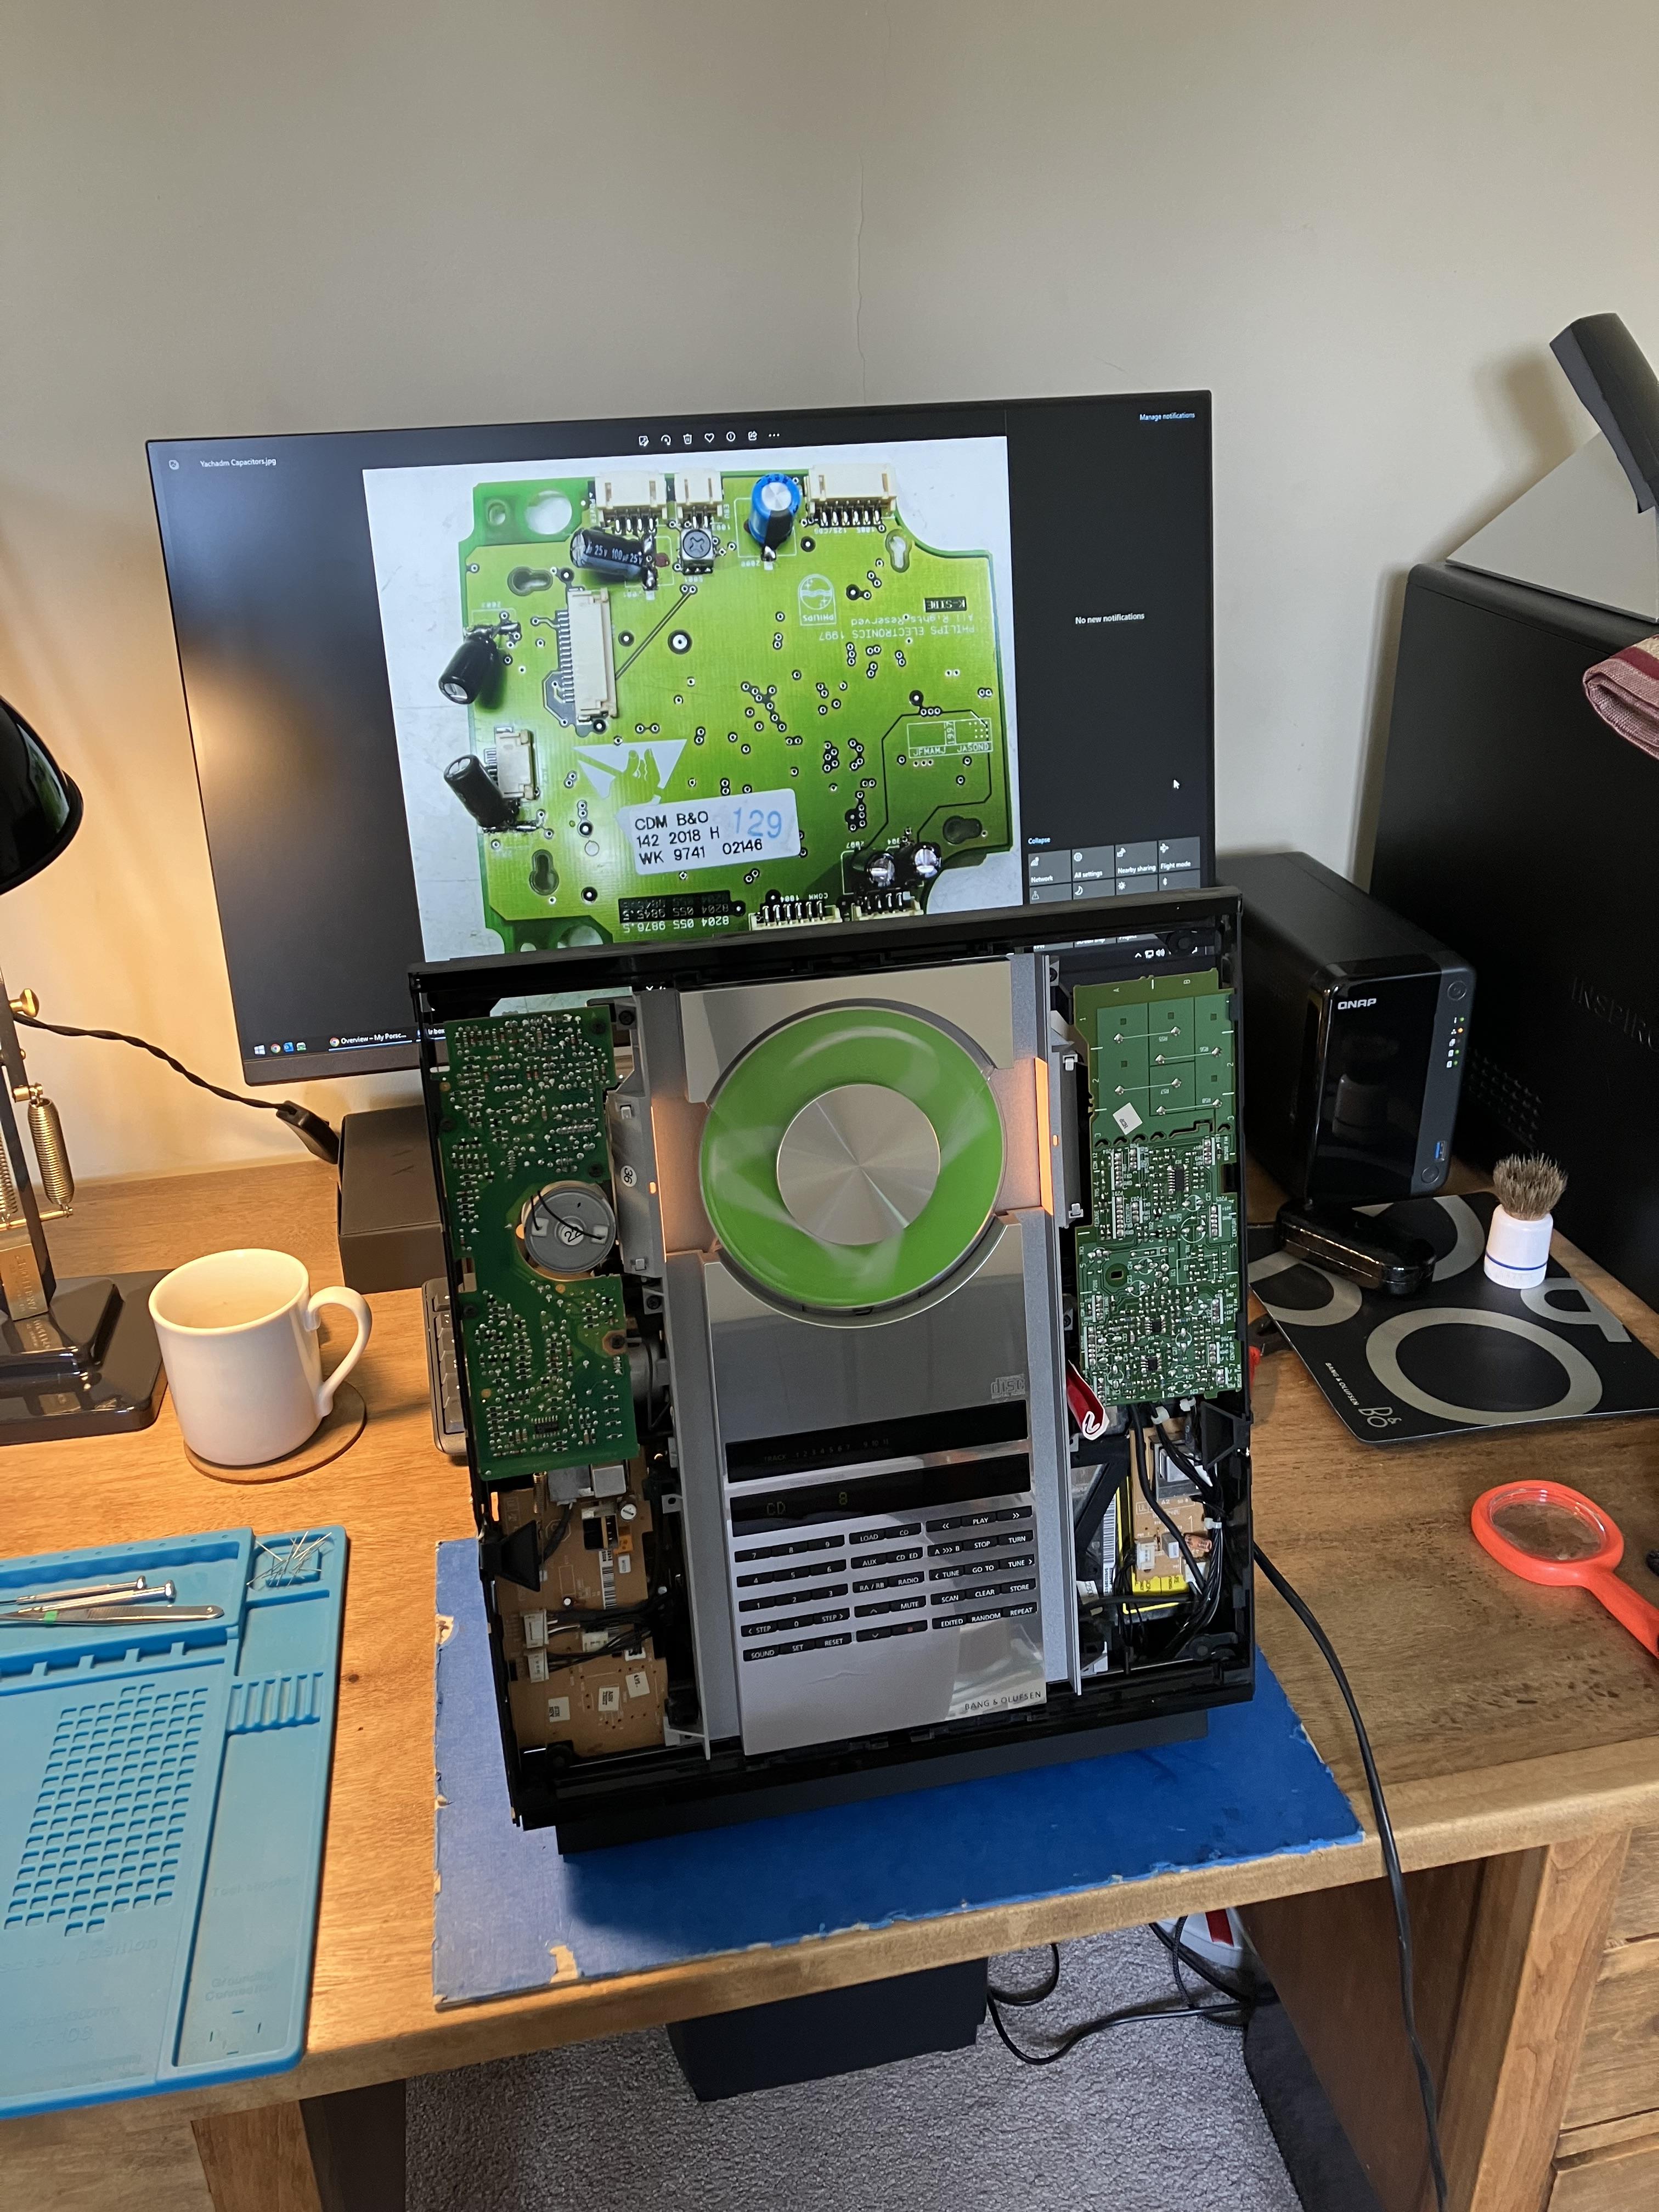
Note the picture of Beoworld member yachadm’s soldered CD board on the PC screen behind which was used for inspiration (although I orientated a couple of my capacitors in different directions), and many thanks to madskp and Dillen for their help and encouragement. I have left the new Beoparts laser fitted but will keep the one that I removed (as it is probably serviceable) for future repairs of other kit.
I will be giving the BC2300 an extended test before full re-assembly, and potentially do the other jobs (belts, adjustment of display brightness and battery replacement).
EDIT: Links to capacitors used, for reference:
Excellent news! I have had similar experiences with BeoCom 6000s not registering for ages, and then suddenly connecting out of the blue!
I don’t recognise that model of DC supply but I am not familiar with what may have been supplied to the US market. I am surprised that it does not have a 15V output, but if it worked previously then perhaps 12V/500 mA was enough.
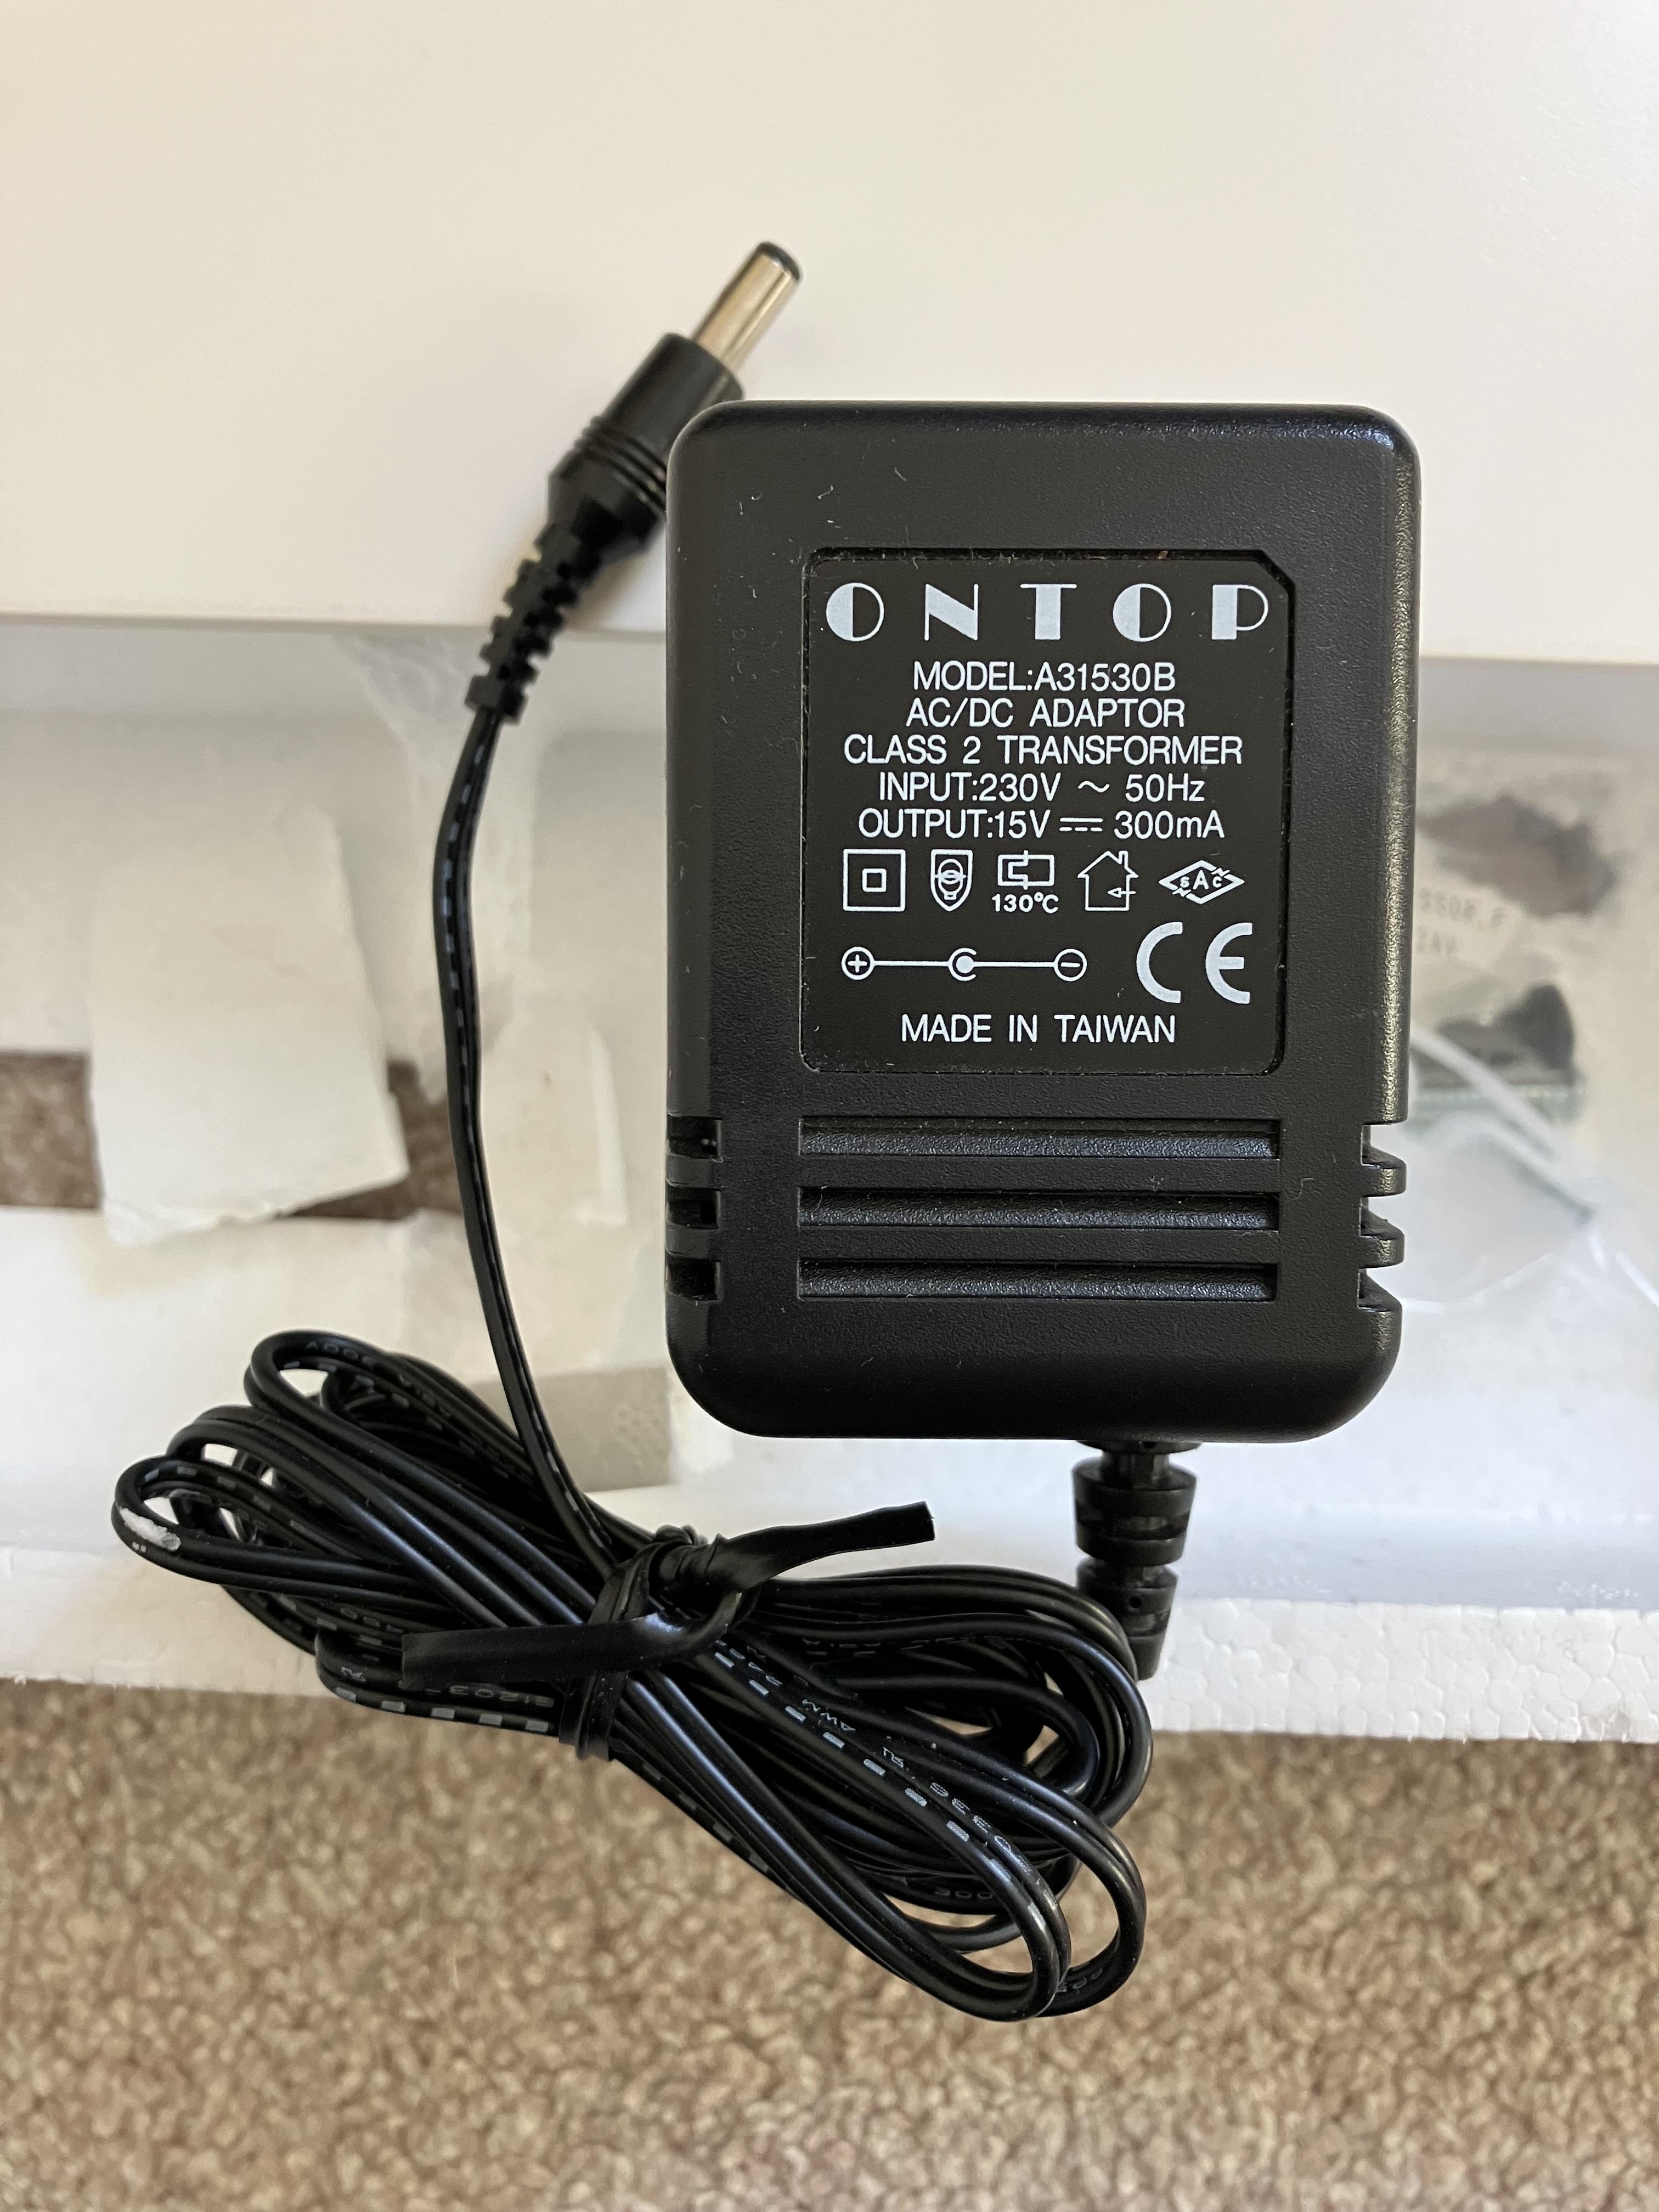
Have you measured the output of the DC supply with a multimeter? You might find that the voltage is a bit higher than the rated 12V. Despite stating 15V, the one that I pictured actually reads 23 V when it’s not connected to the MCL2AV.
If you do have to buy a replacement DC supply then make sure that the connector has the correct polarity; unusually the B&O one requires the centre to be negative, outer positive as you can see on the little diagram on both our adaptors. A good electronics store should be able to supply a similar adaptor to the one you pictured – I can’t recommend any particular US supplier.
Also check the connections inside the MCL2AV – the cable that comes from the BM4500 may have disconnected from one of the terminals. And check the connections to the IR sensor/transceiver that you replaced – are you able to refit the old (faulty button) one to see if it will see work?
I wouldn’t rule out a faulty MCL2AV – they do fail, and this thread is an example where madskp had to do some fault finding and repair: https://beoworld.dev.idslogic.net/forums/topic/mcl2-av-no-55v/#post-15498
Hi and welcome to Beoworld!
The MCL2AV shown in your first picture should be powered by a 15V DC supply that usually comes from a mains adaptor. This little disconnected plug at the top of your first picture looks like it has become disconnected, so that could be your problem.
The MCL2AV will be getting some power (voltage) also over the MCL connections from the BM4500 (but not enough power to work properly), so that could account for the 2v that you have measured.
The UK mains adaptor looks like this:
- AuthorPosts
